How to Insert a Signature into a PDF Online for Free (Draw, Type or Upload)
Contracts, forms, approvals and reports often come back as one request: please sign and return. You do not need to print, sign and scan. This guide shows how to insert a signature into a PDF online with ToolTiny: draw it with the mouse, type your name in a handwriting style or upload a photo of your signature, then place it on any page, resize it and download the signed file. No sign-up needed.
Why Insert a Signature Online
- No printer or scanner. Sign from your computer in a minute.
- Three ways to sign. Draw, type or upload, whichever suits your device.
- Exact placement. Drag and resize the signature until it sits on the line.
- Any page. Sign one page, several, or all of them at once.
- Free. No account and no watermark.
Watch the Whole Process
The recording uploads an 8-page PDF, tries the Type, Upload and Draw tabs, places a signature on page 1 and page 8, resizes it and checks the signed file.
How to Insert a Signature into a PDF, Step by Step
-
Open Insert Signature PDF
In the top bar open PDF Tools and choose Insert Signature PDF at the bottom of the list, or go straight to tooltiny.com/insert-signature-pdf.html.
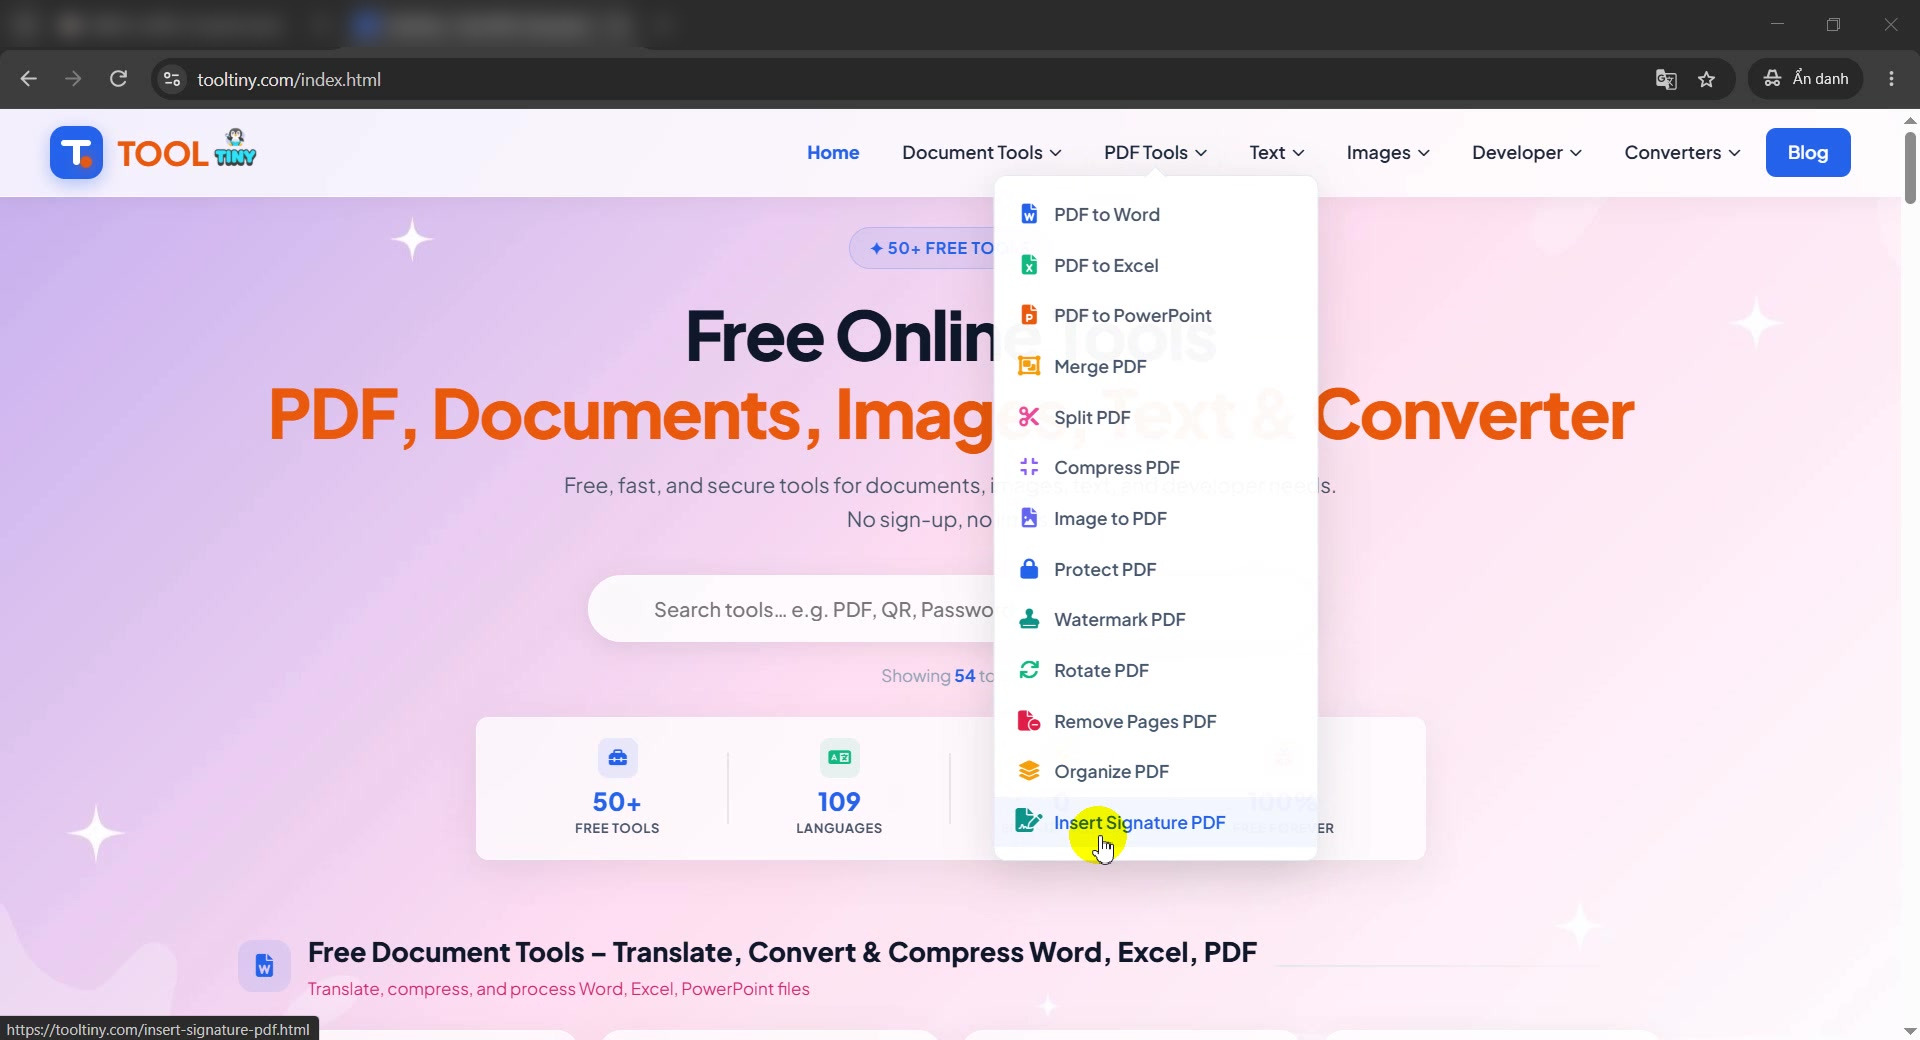
PDF Tools → Insert Signature PDF -
Find the upload box
The page is titled Insert a Signature into a PDF Free Online. Click the dashed box Select a PDF file, or drag your document into it.
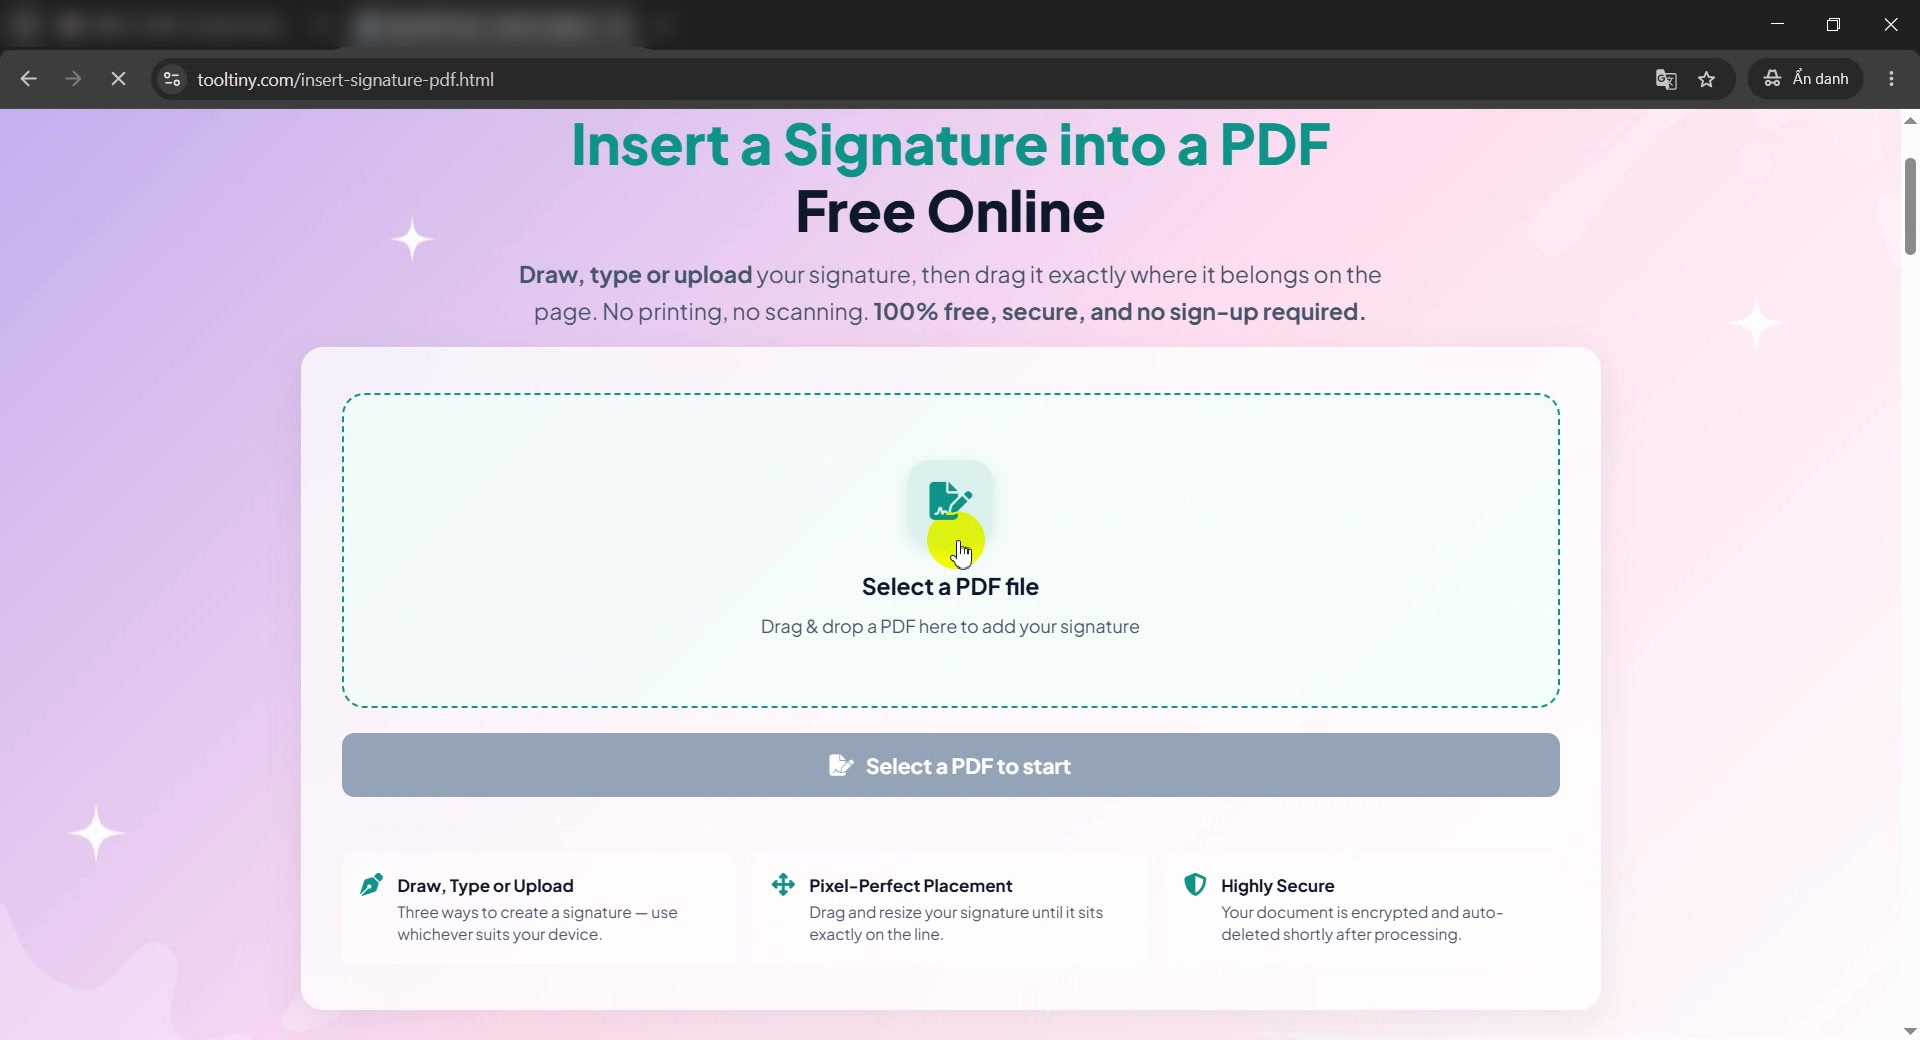
Click Select a PDF file -
Choose your PDF
Pick the document in the Open dialog. Our test file is sample-pages.pdf, an 8-page report.
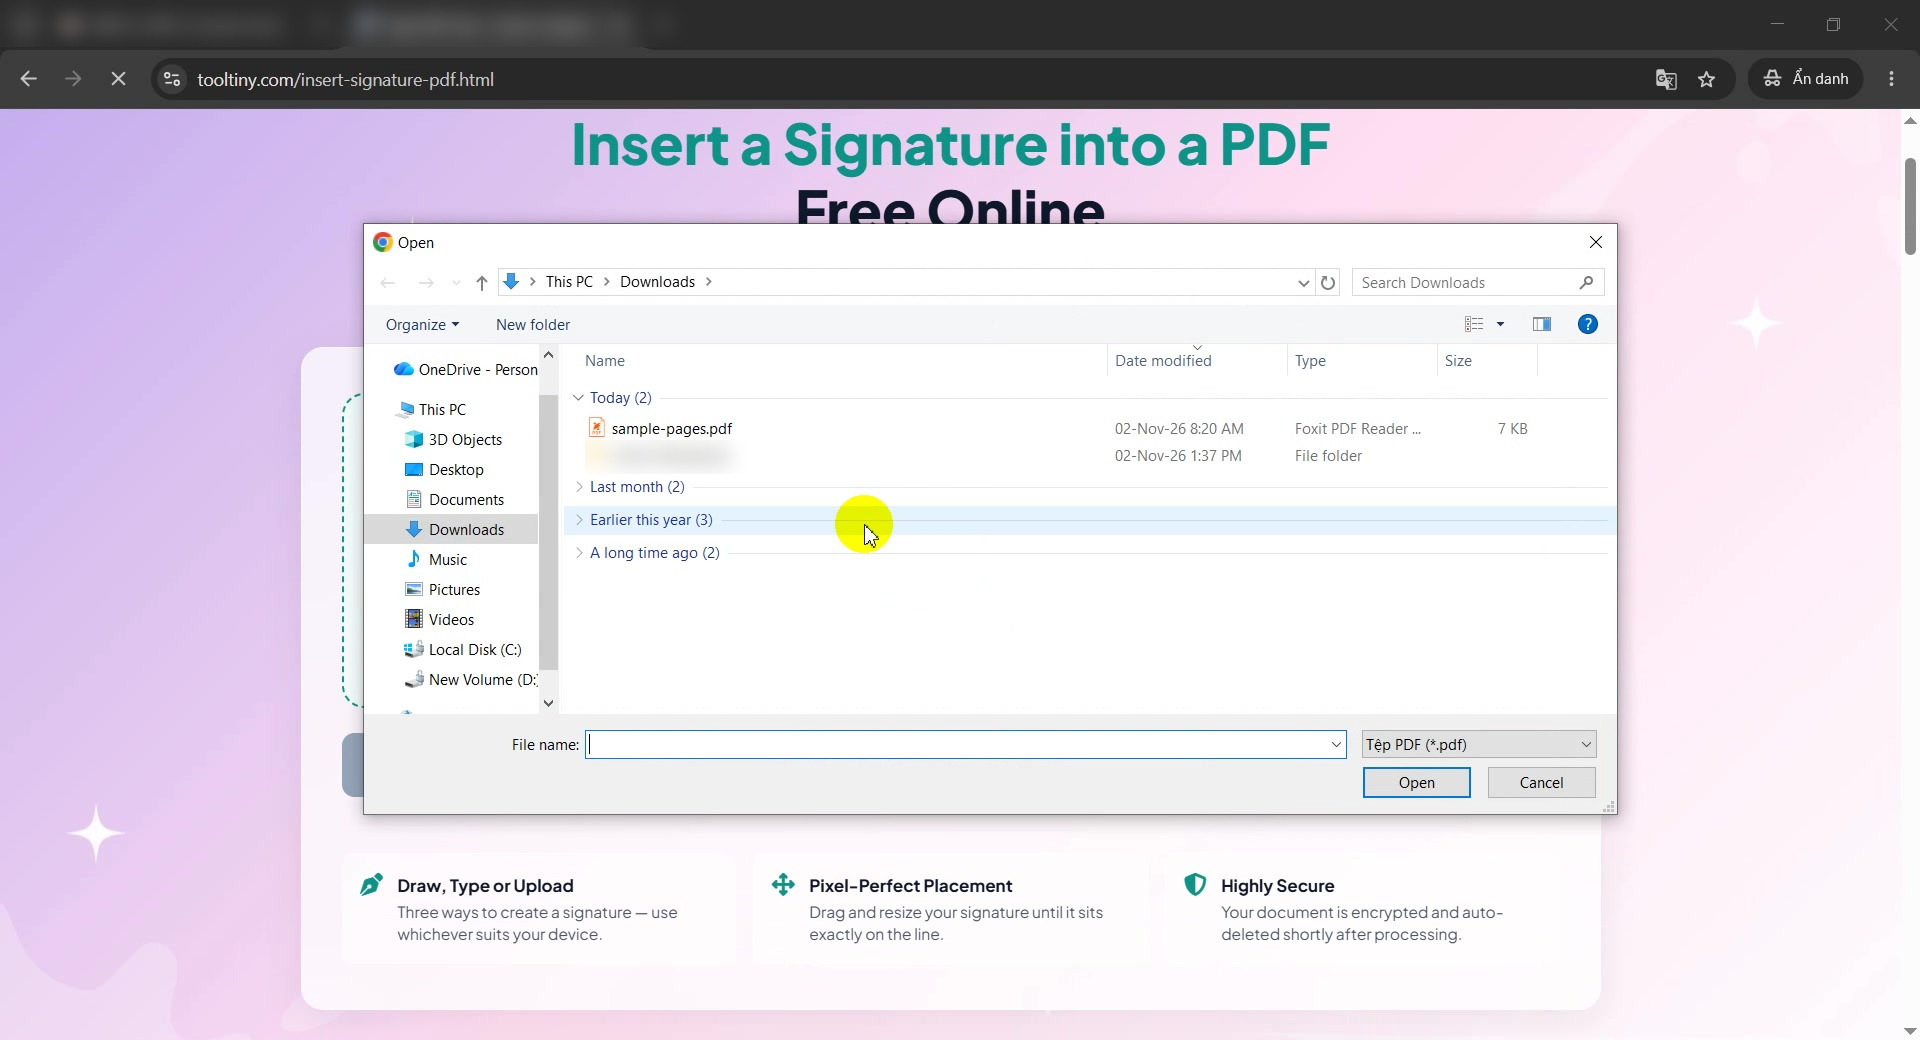
Choose the PDF -
Wait for the editor
The editor opens with the page thumbnails on the left (Page 1 of 8), a large preview of the page and the Your signature panel on the right.
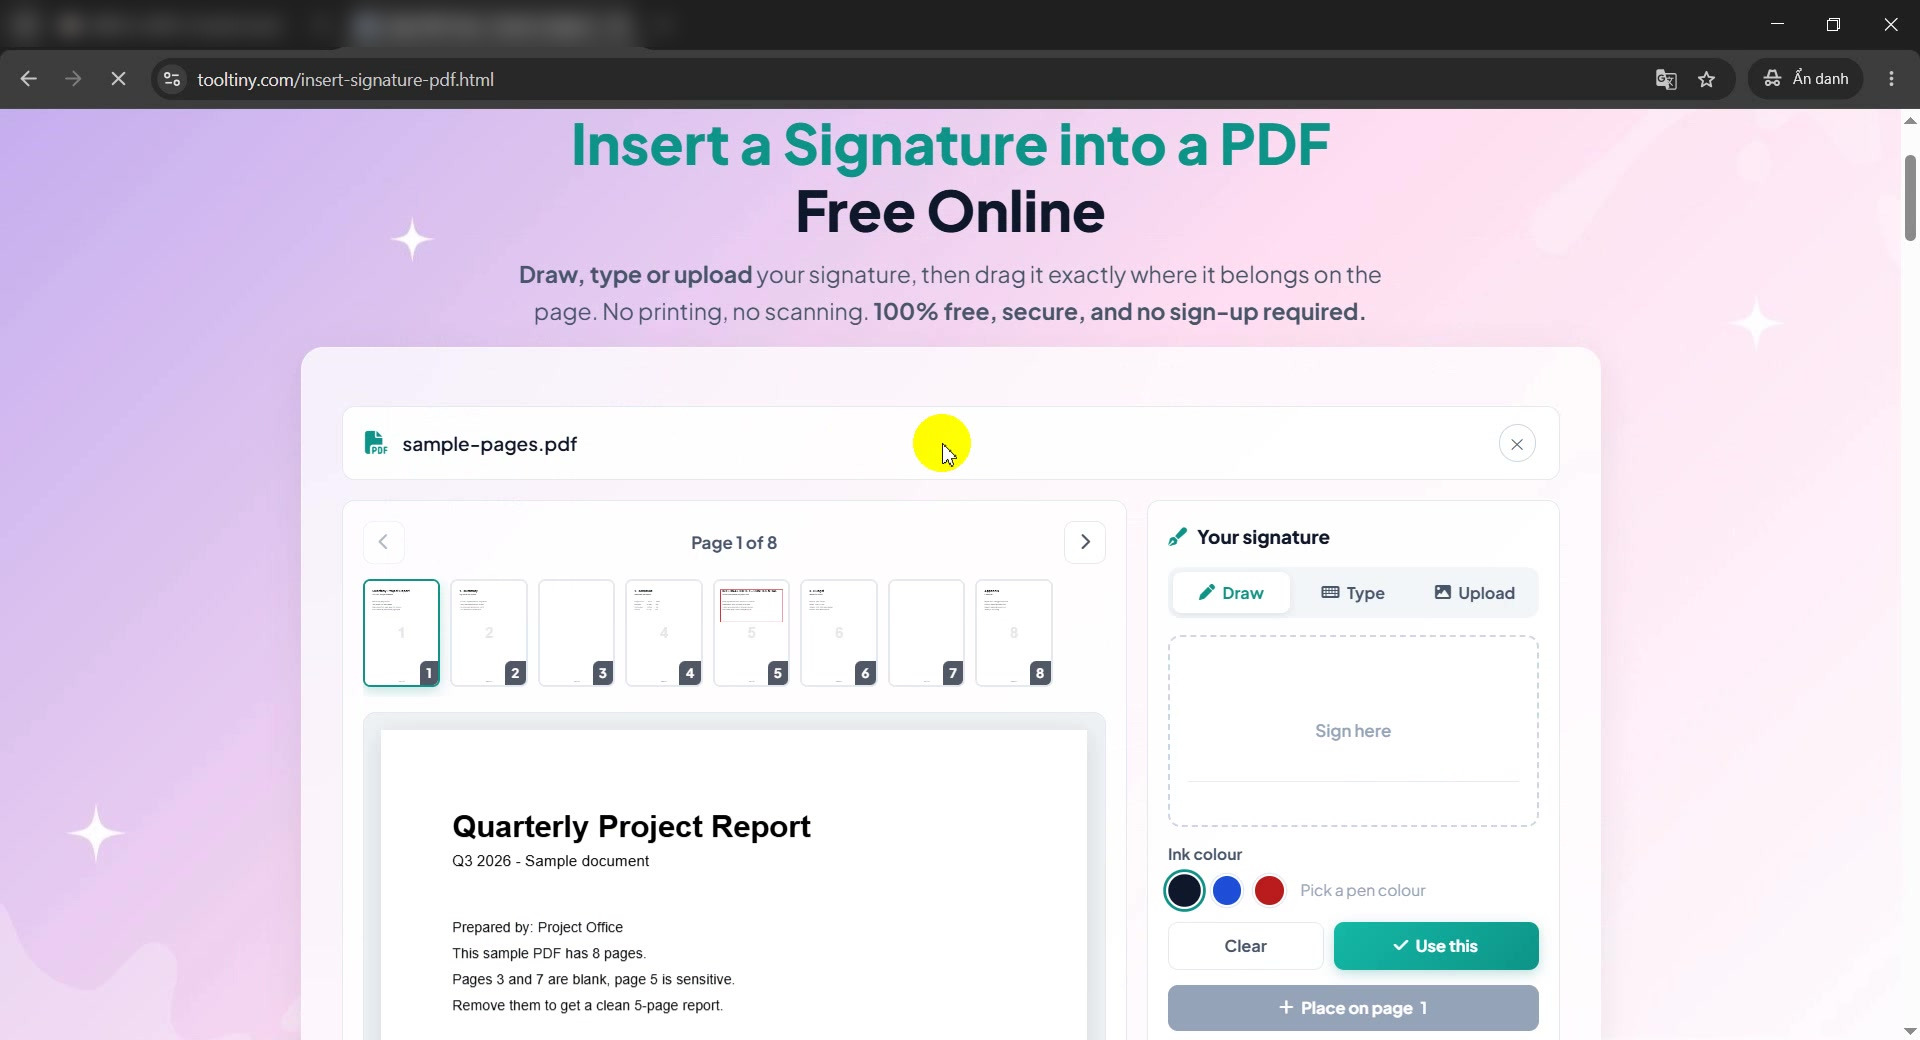
The signature editor -
Option 1: type your name
Open the Type tab and enter your full name. The tool offers four handwriting styles.
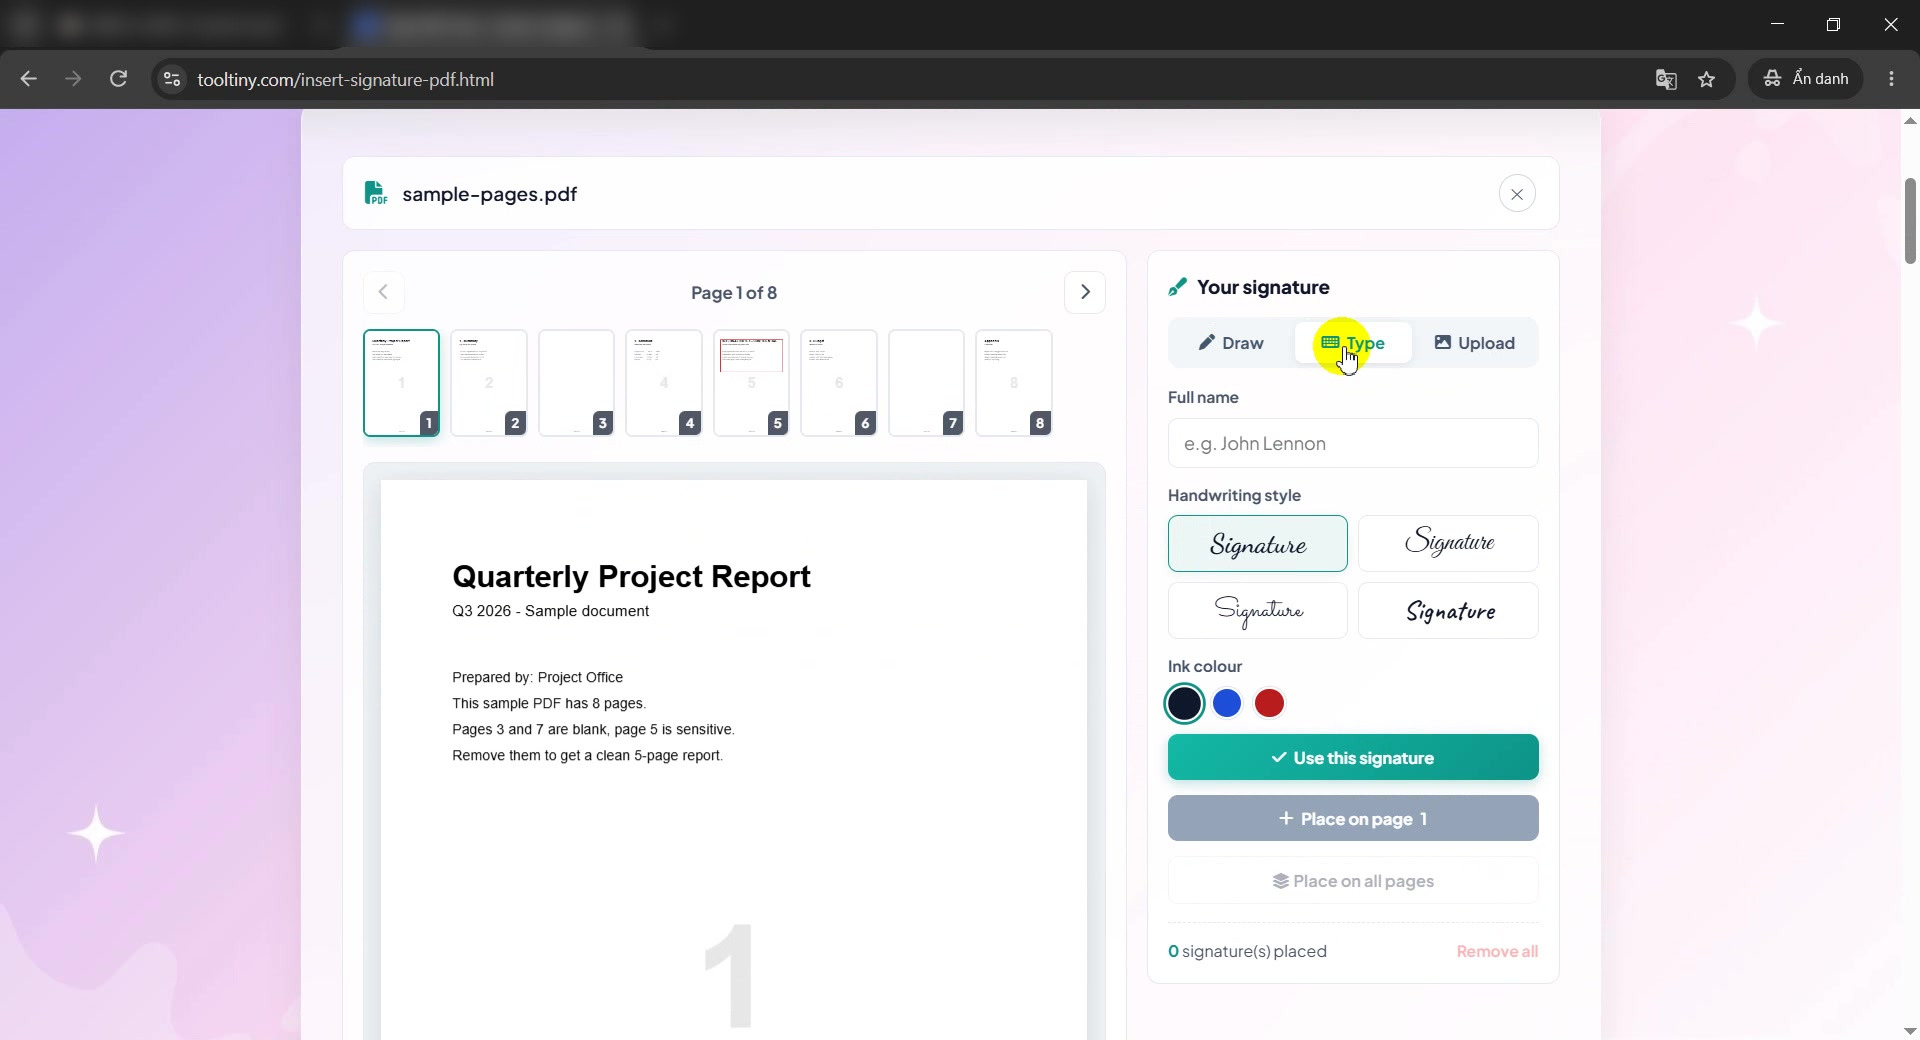
Type tab: full name -
Pick a style and an ink colour
Click the style you like and choose black, blue or red ink. Then click Use this signature.
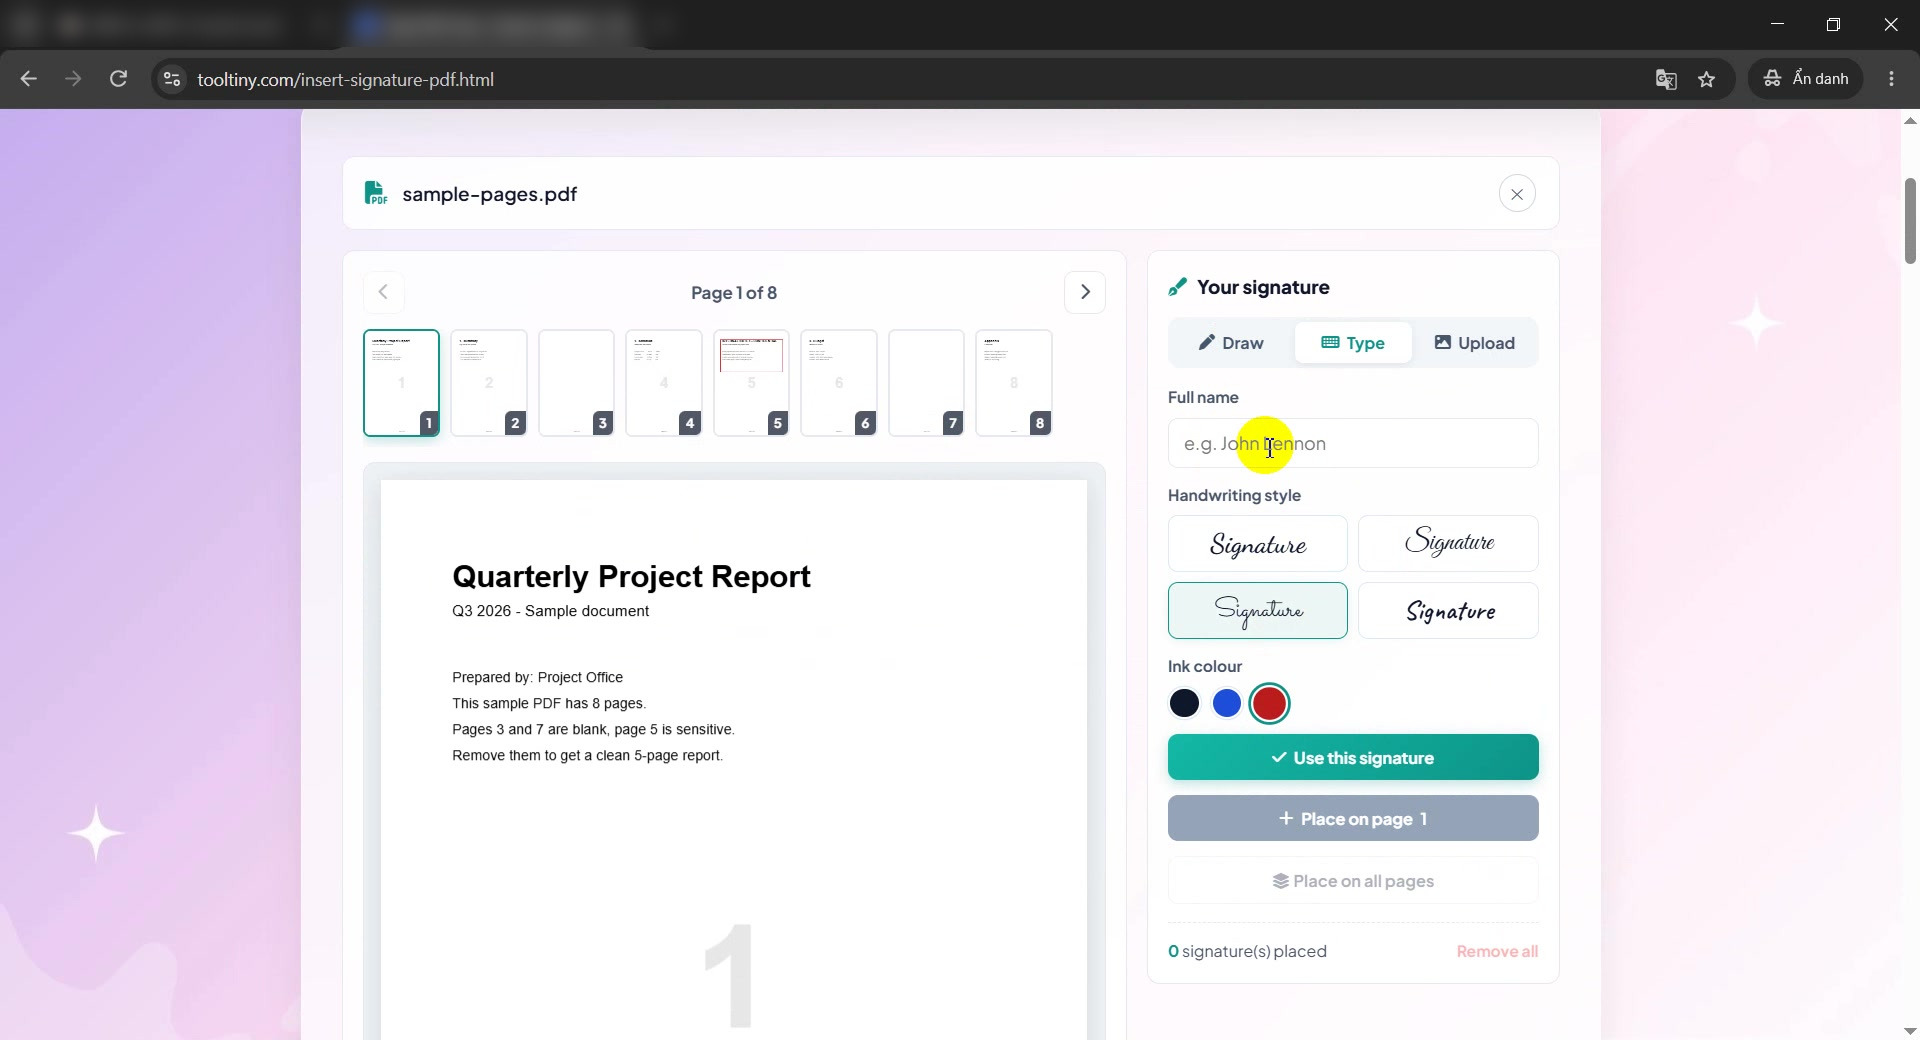
Style and ink colour -
Option 2: upload a photo of your signature
Open the Upload tab and add a PNG, JPG or WebP photo. Leave Remove the white background automatically ticked for a photo taken on paper.
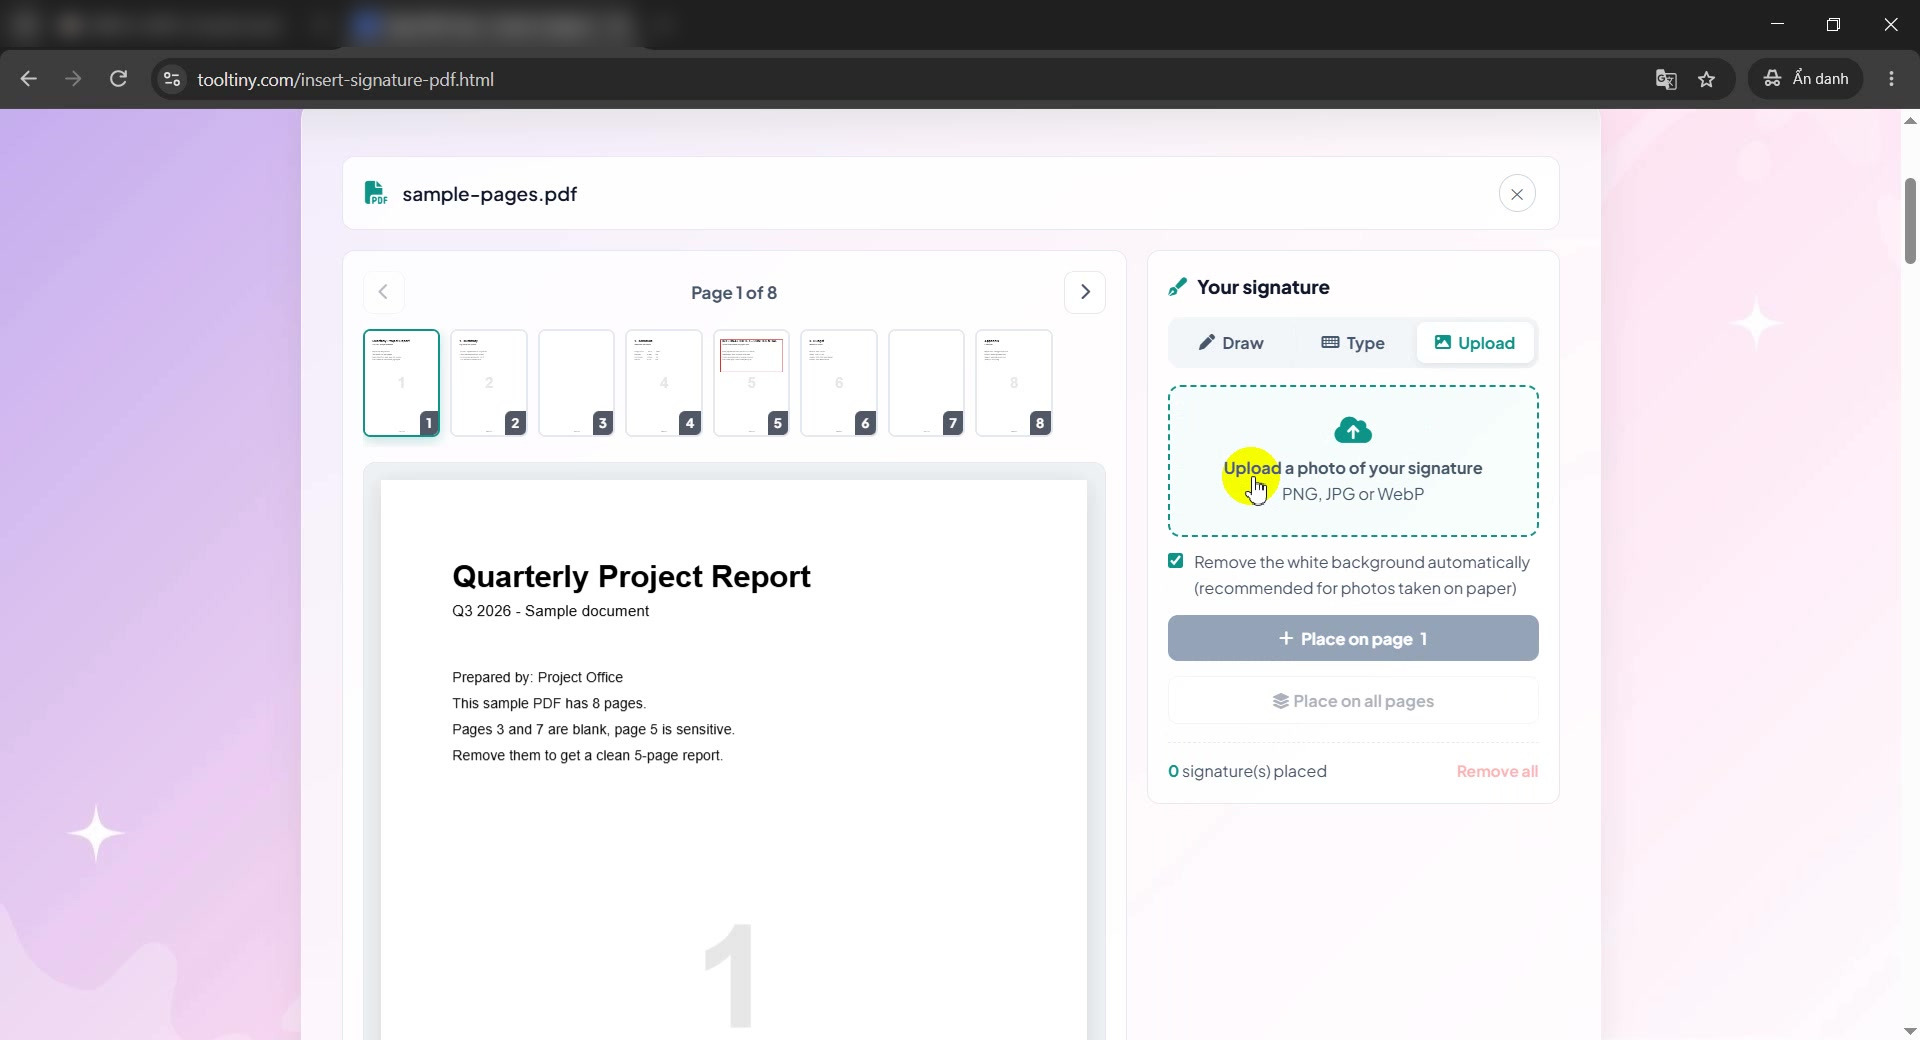
Upload tab -
Option 3: draw it with the mouse
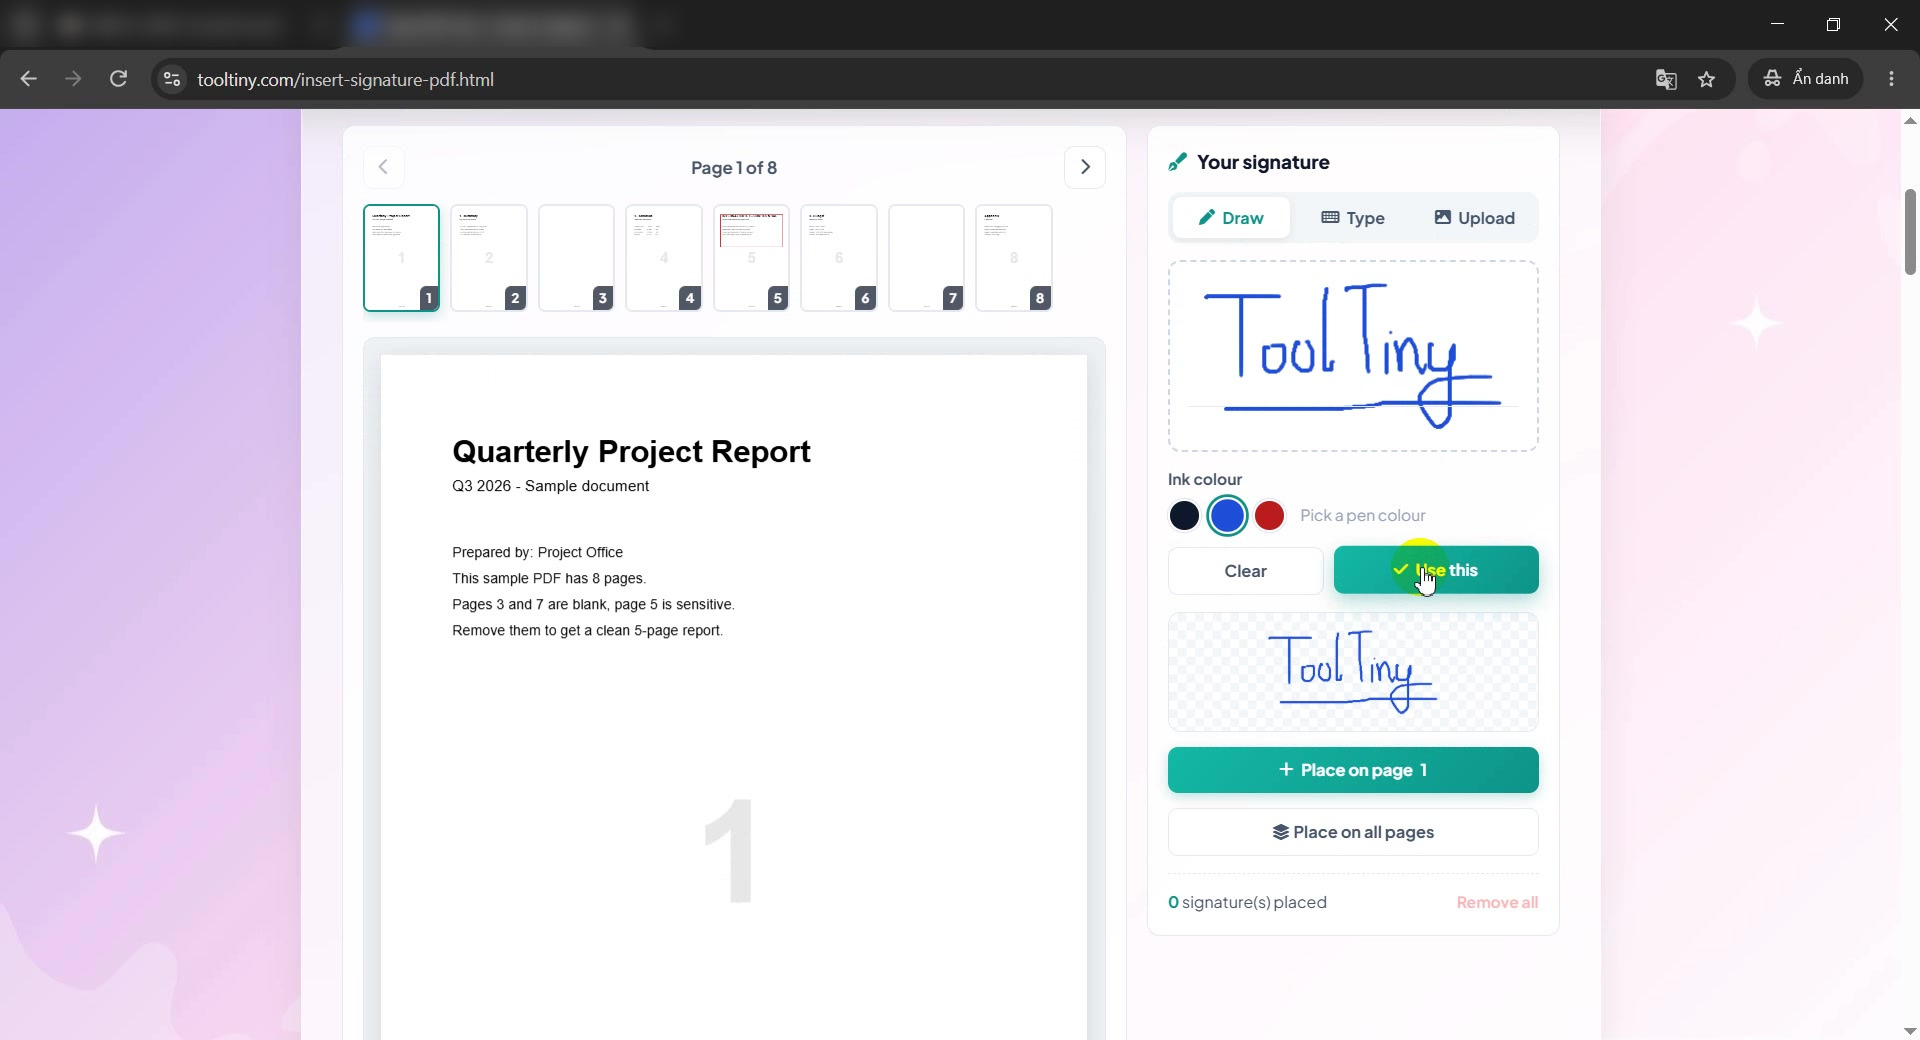
Open the Draw tab and sign inside the box. We wrote ToolTiny in blue ink. Use Clear to start over.
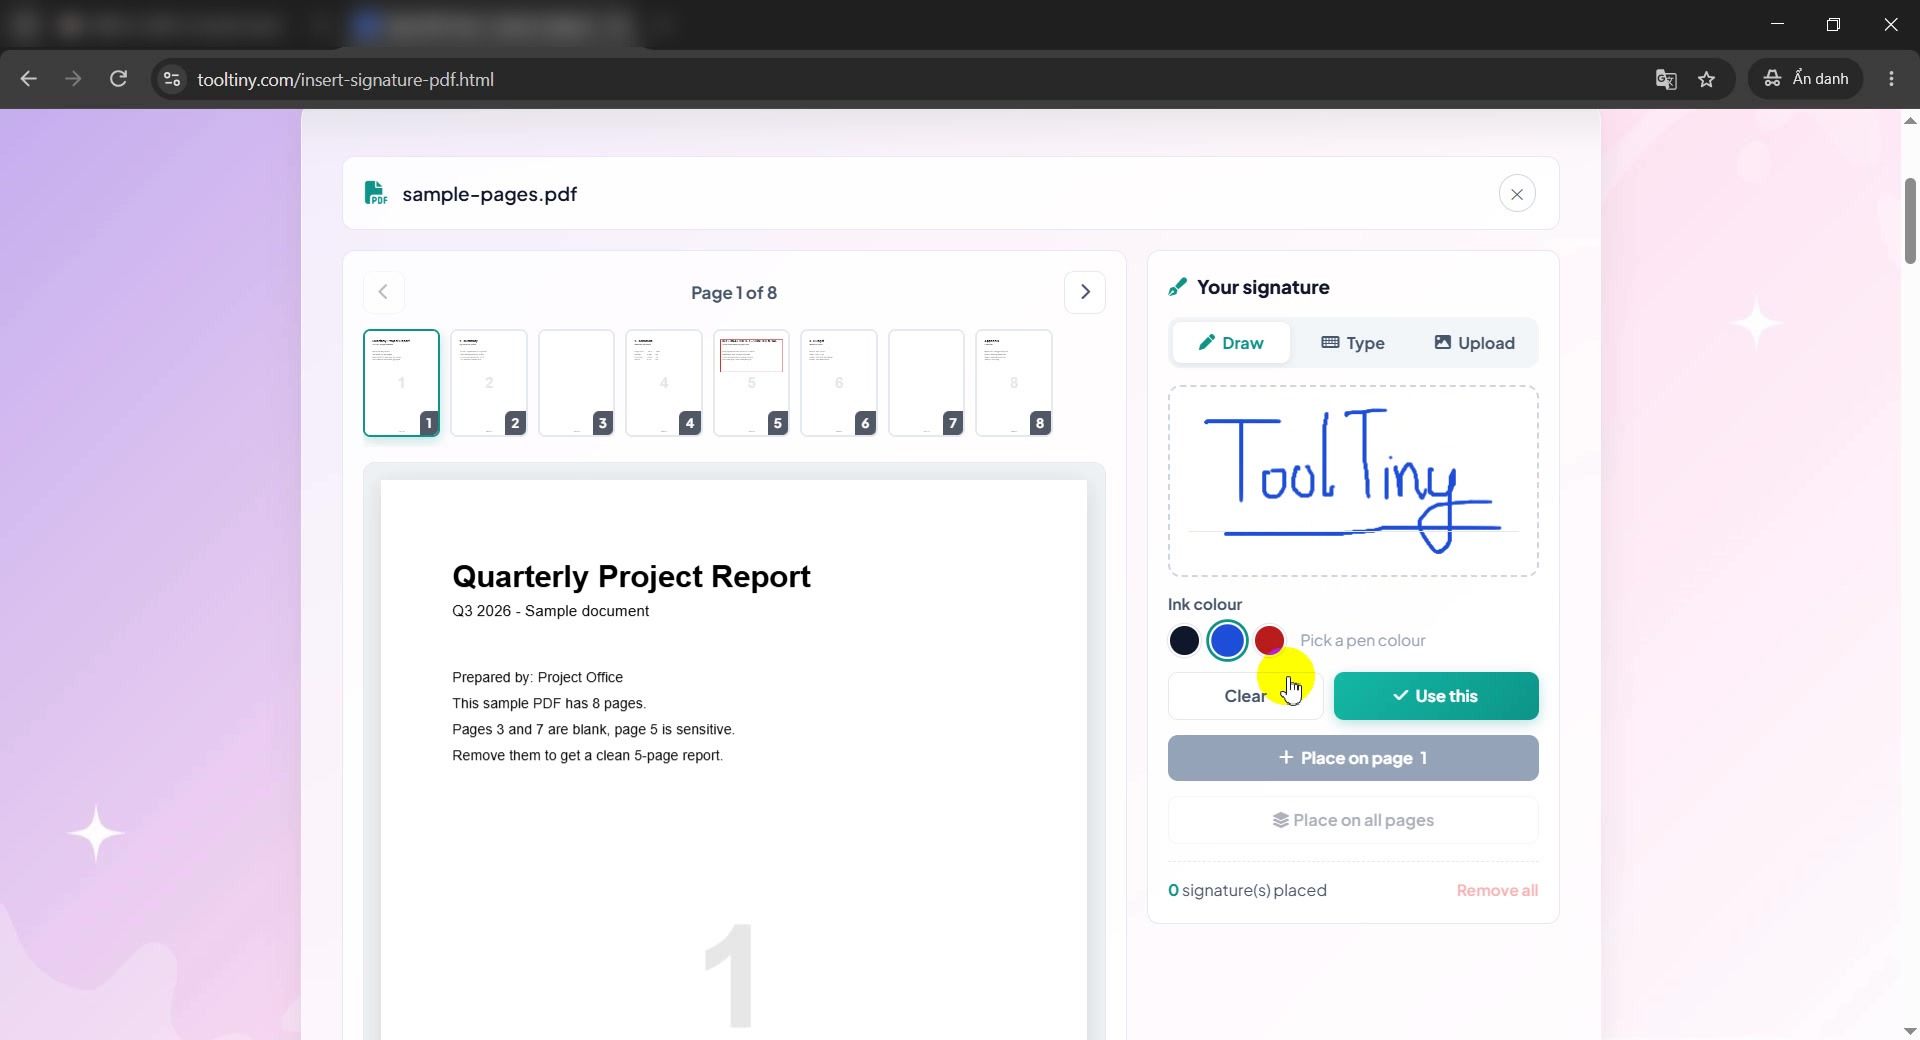
Draw tab -
Click Use this
Click Use this. A preview of the signature appears under the buttons and the placing buttons turn green.
Use this -
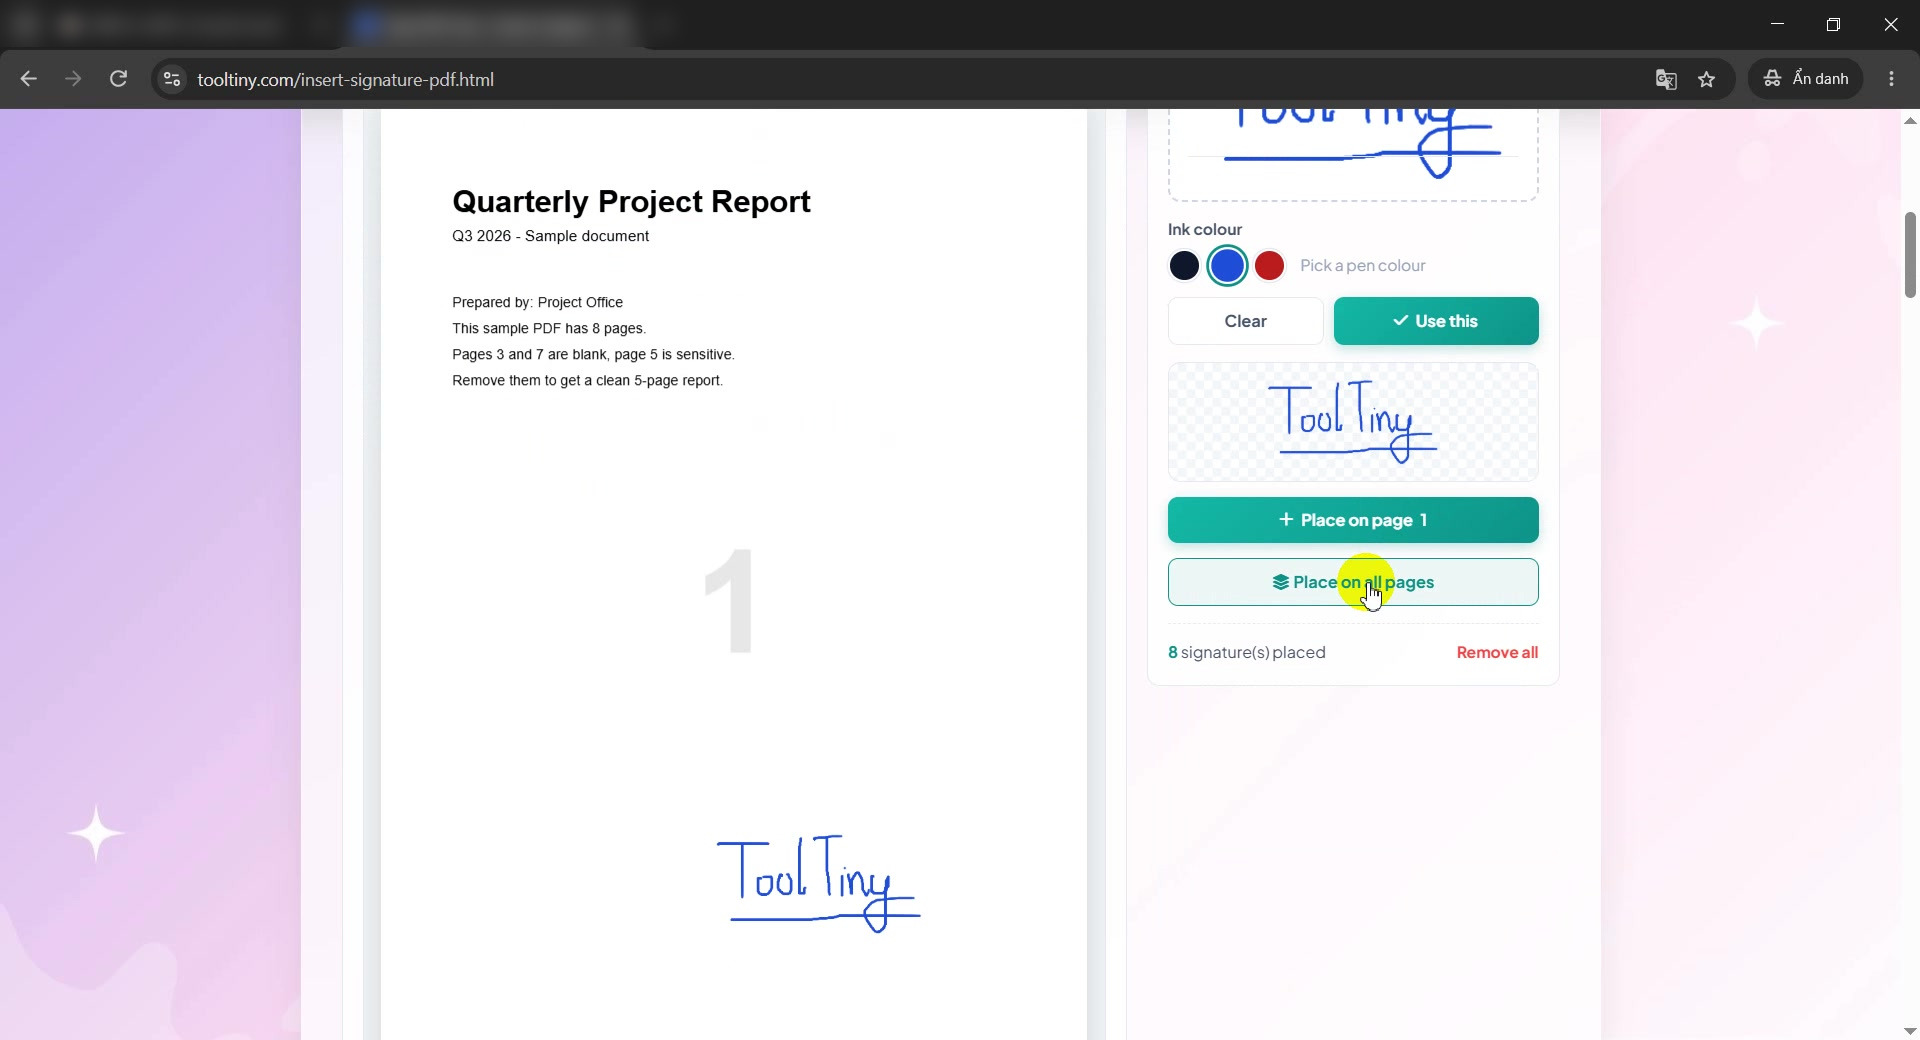
Sign every page at once (optional)
Place on all pages puts the signature on each page of the document. In our test it reported 8 signature(s) placed. Click Remove all if you only need some pages.
Place on all pages -
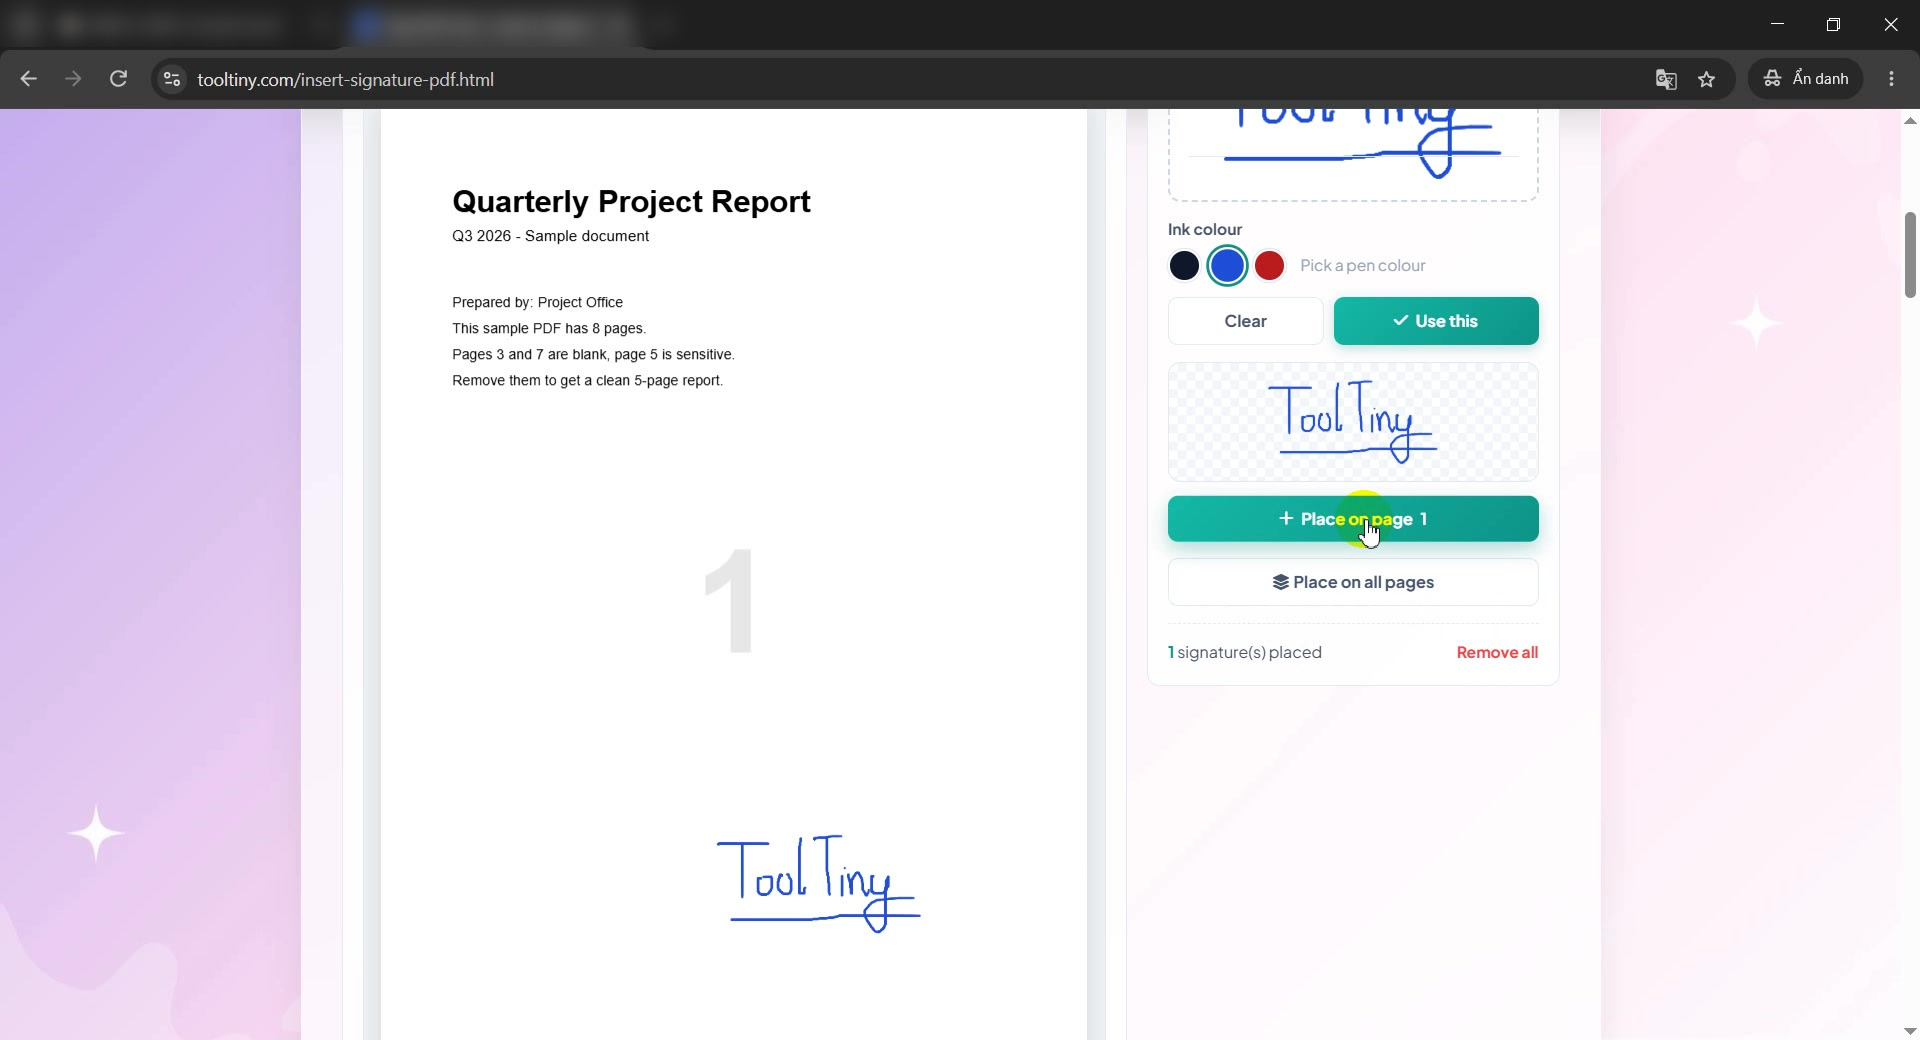
Place it on page 1
To sign one page, click Place on page 1. The signature appears near the bottom of the page and the counter reads 1 signature(s) placed.
Place on page 1 -
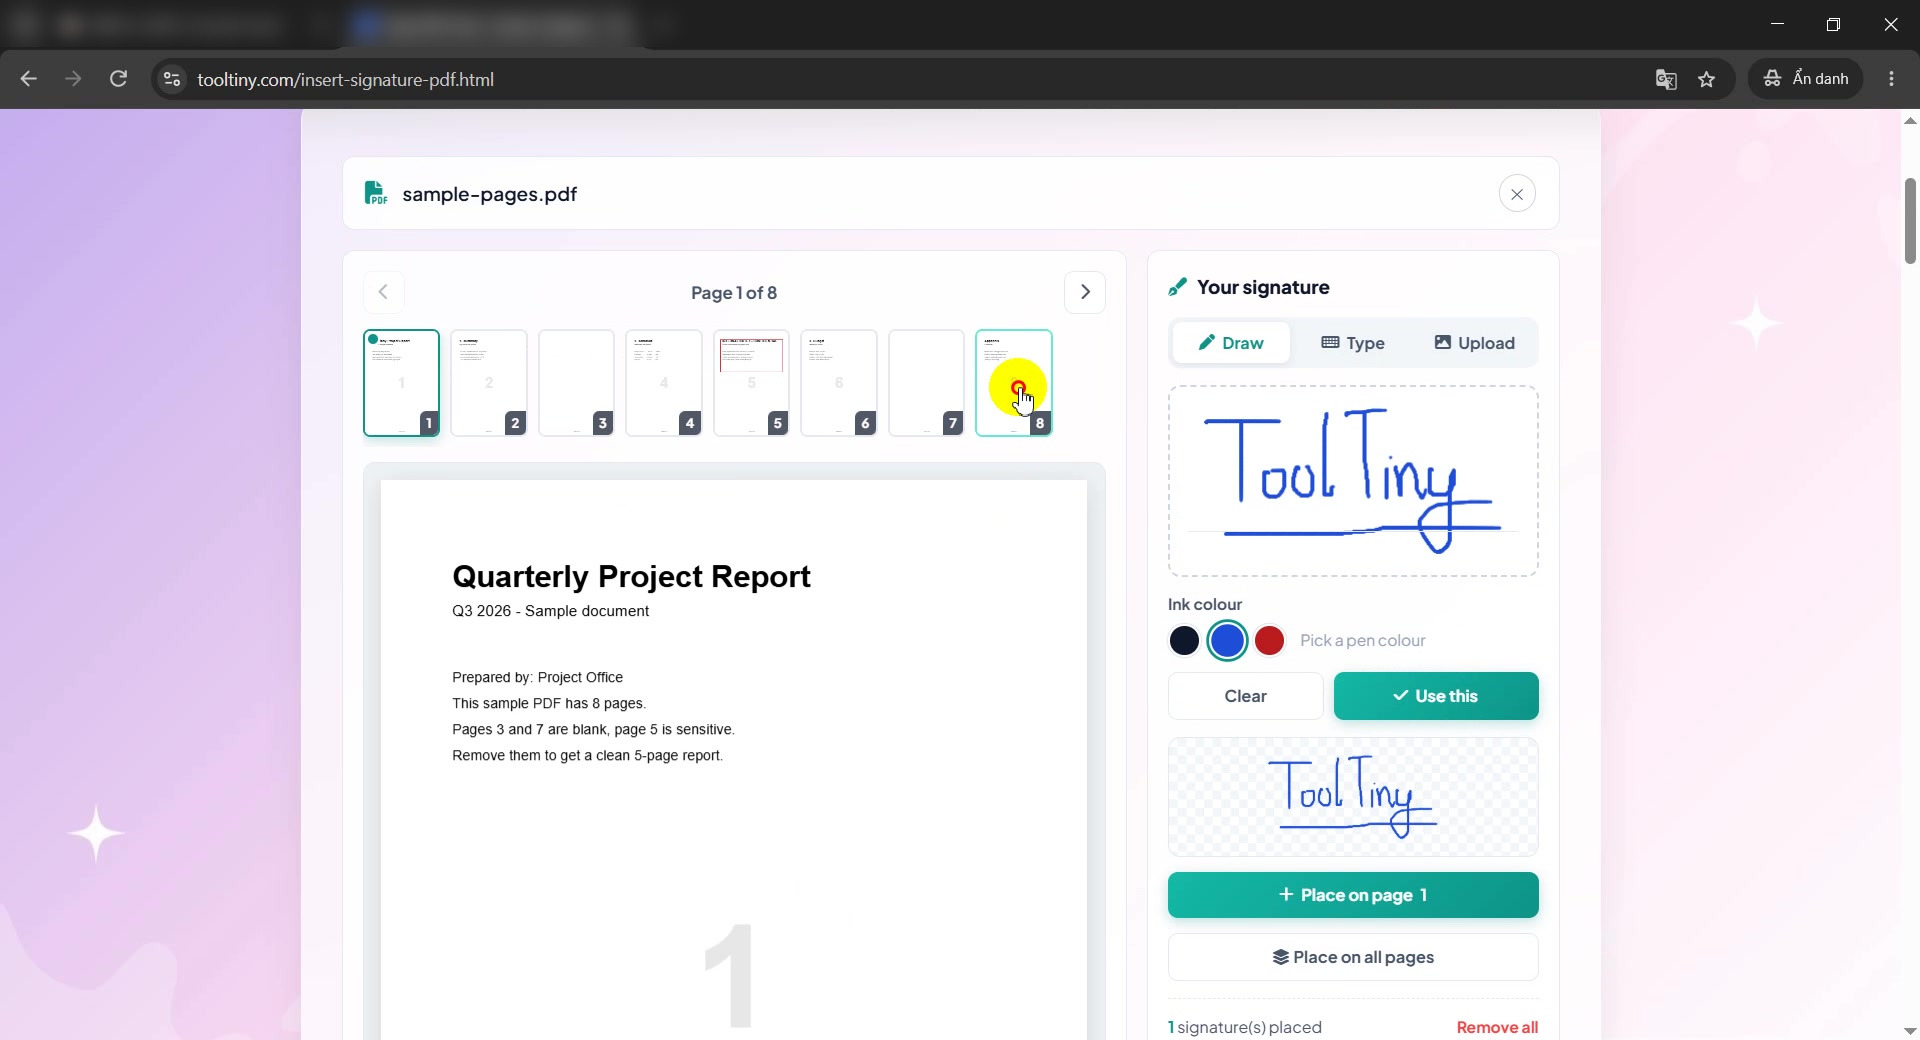
Go to another page
Click a thumbnail to switch pages. We selected page 8, the Appendix, and the button changed to Place on page 8.
Select page 8 -
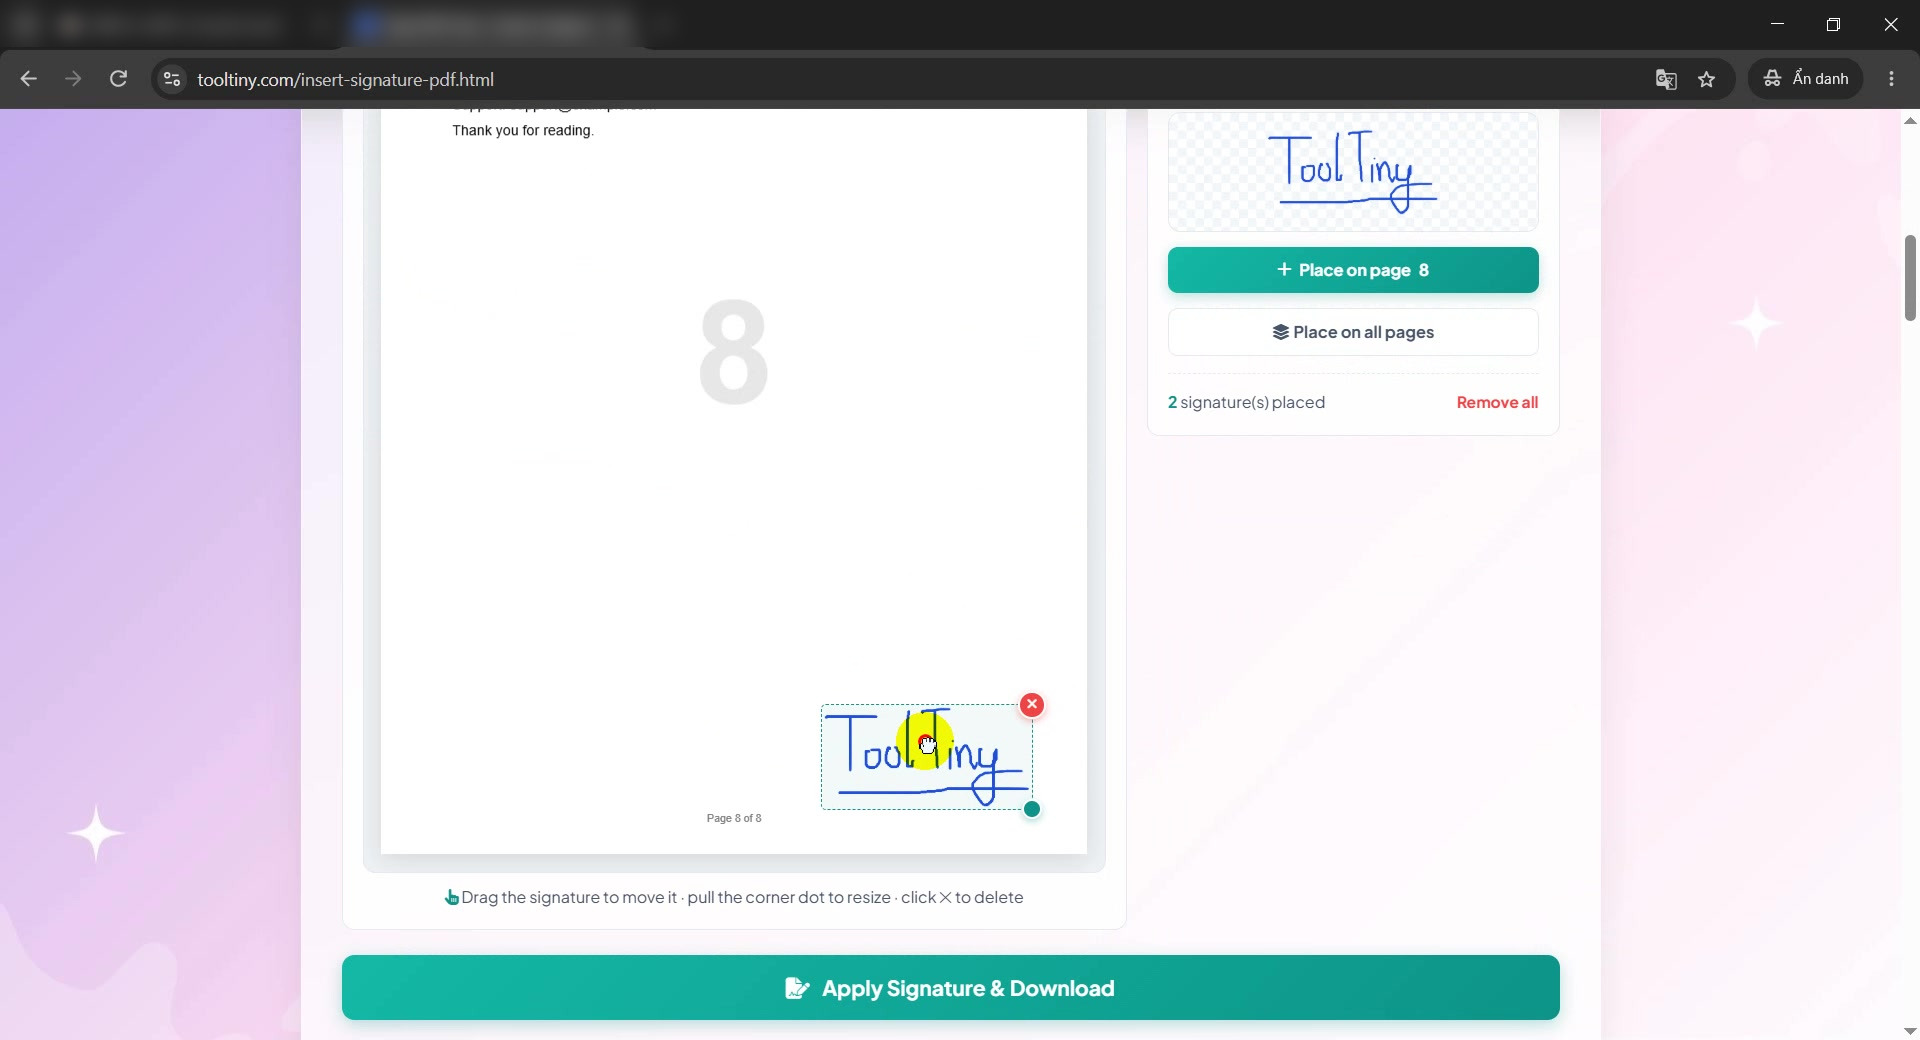
Drag the signature into position
Place it, then drag it where you want. A red × deletes it and the corner dot resizes it. The hint reads Drag the signature to move it, pull the corner dot to resize, click × to delete.
Drag, resize, delete -
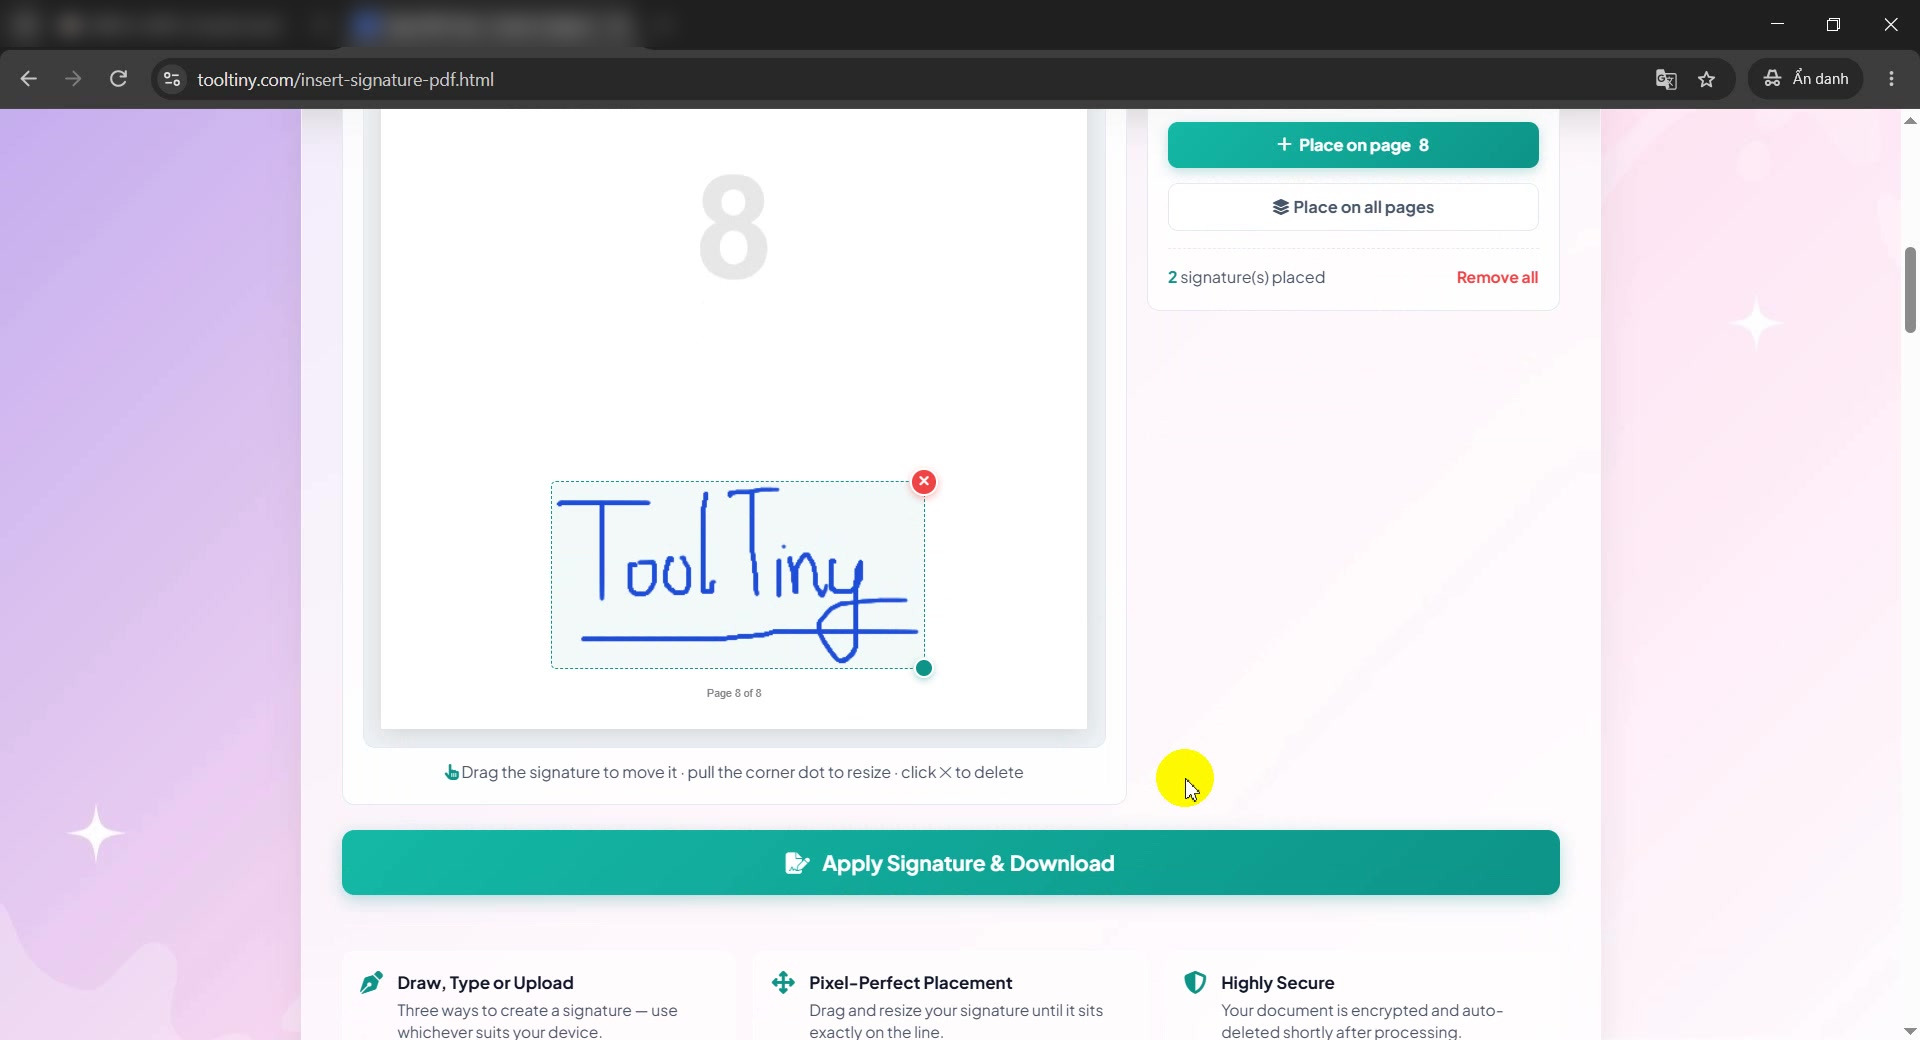
Resize it
Pull the corner dot to make the signature larger or smaller. Then click Apply Signature & Download.
Resized signature -
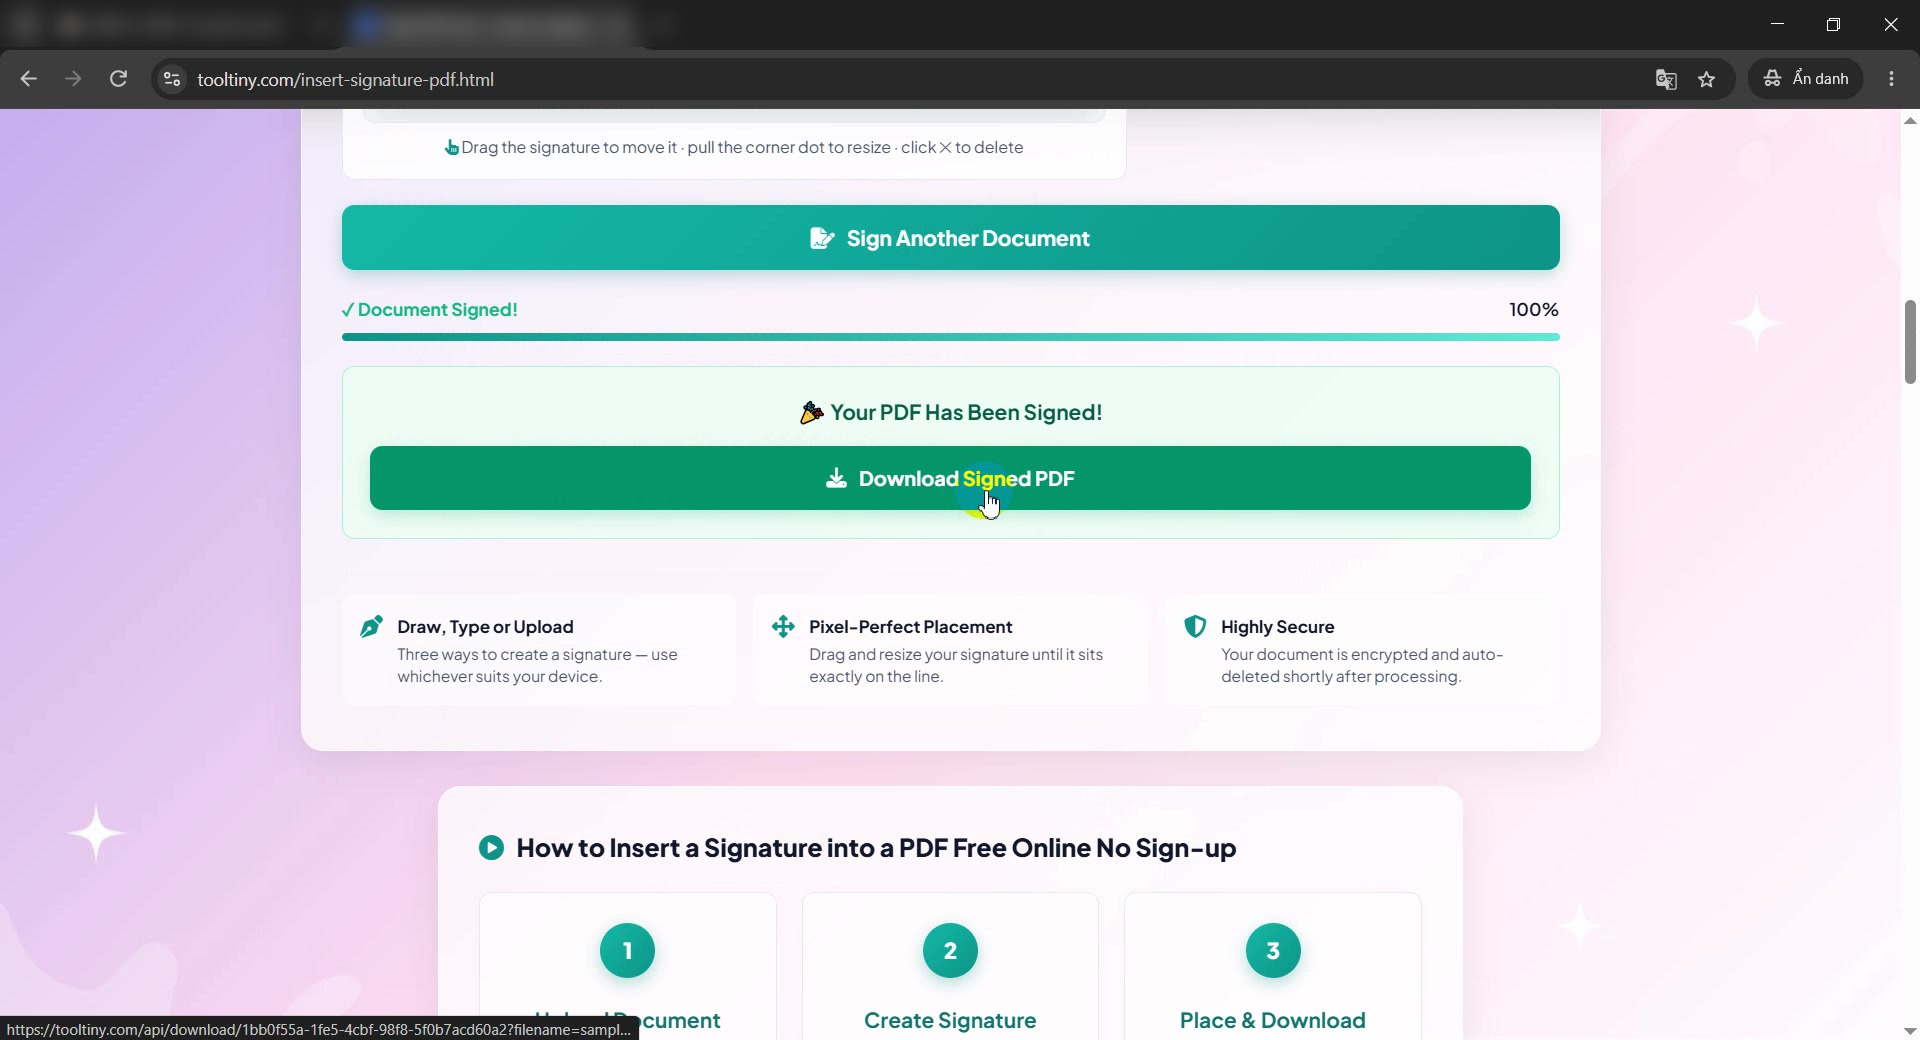
Download the signed PDF
After a short Applying your signature… progress bar you see Your PDF Has Been Signed!. Click Download Signed PDF.
Document Signed! -
Save the file
Your browser suggests the name
sample-pages_signed.pdf: your original name with_signedadded. Click Save.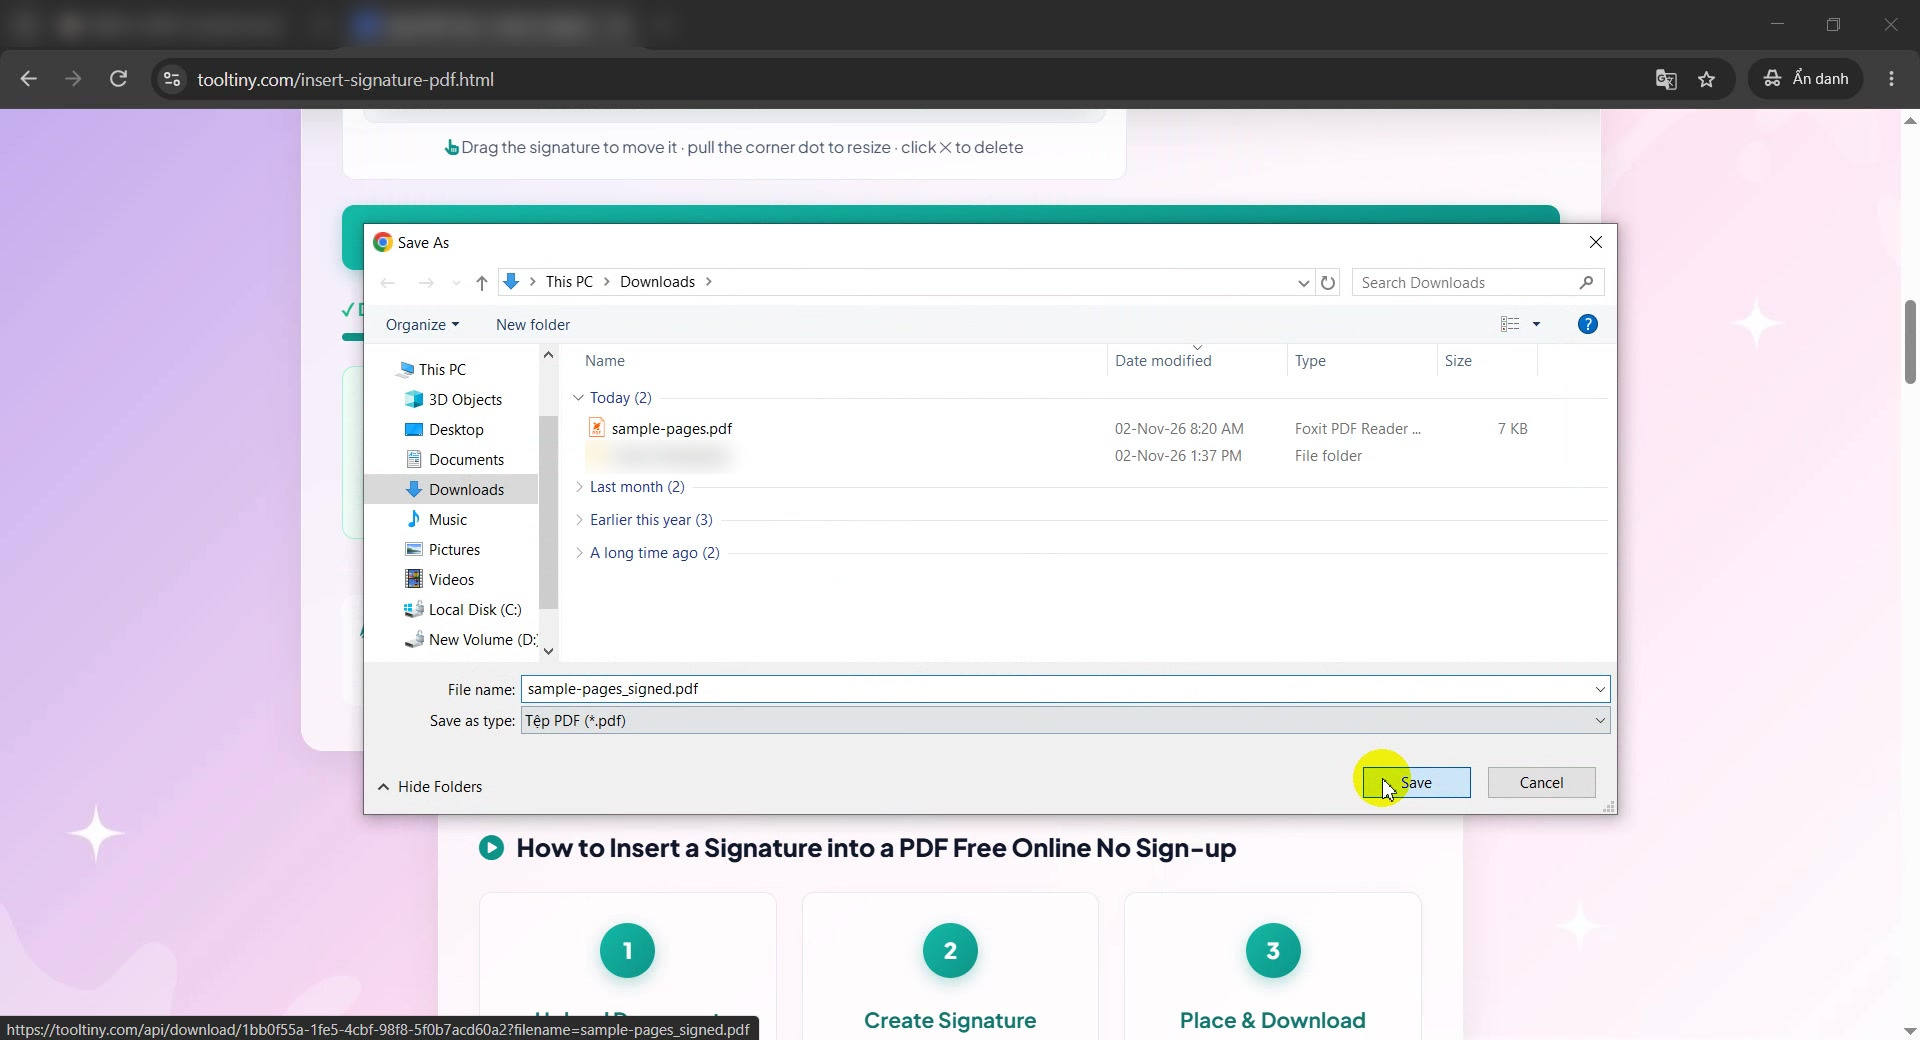
Save the signed PDF -
Open the result and check
Open the file in any PDF reader. Page 8 shows the large ToolTiny signature exactly where we placed it.
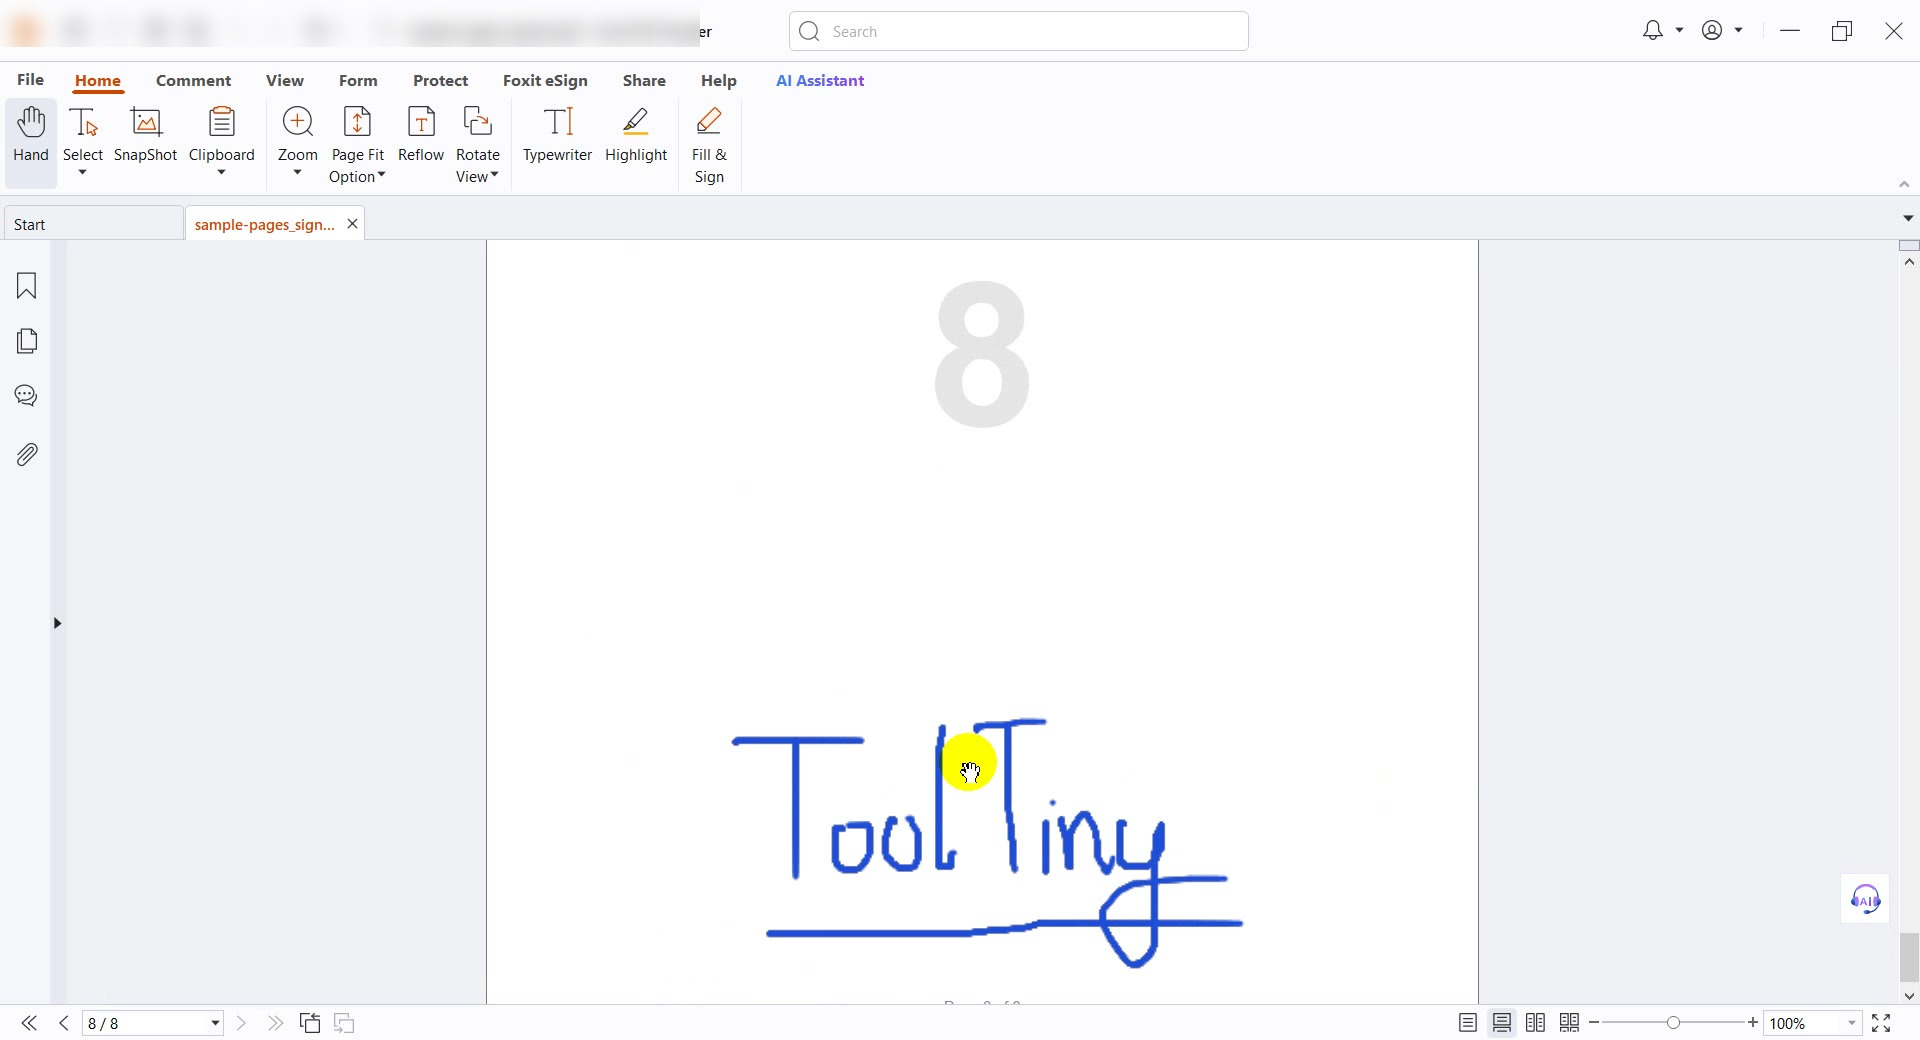
Signature on page 8
Draw, Type or Upload: Which Signature Method to Choose
| Method | Best for | How it works |
|---|---|---|
| Draw | A personal, handwritten look | Sign in the box with the mouse, trackpad or touch screen; pick an ink colour |
| Type | Speed and a tidy look | Enter your full name and choose one of four handwriting styles |
| Upload | Your real signature | Add a PNG, JPG or WebP photo; the white background is removed automatically |
Good to Know
- Image signature: the tool inserts an image of your signature. It is not a certificate-based digital signature.
- Original untouched: you get a new file with
_signedadded to the name. - Nothing is final until Apply: you can move, resize and delete signatures freely first.
- Privacy: files are deleted automatically from the servers about 10 minutes after processing.
- Cost: free, with no sign-up.
Tips for a Clean Signed PDF
- Use a good photo. For uploads, sign on plain white paper with a dark pen and shoot in daylight.
- Keep it proportional. Resize with the corner dot so the signature is not stretched.
- Delete extra pages first. Remove Pages you do not need before signing.
- Fix the order. Organize PDF pages so the signature page comes last.
- Protect the result. Add a password with Protect PDF.
- Reduce the size. Use Compress PDF before emailing.
- Mind confidentiality. Files are uploaded for processing. Do not upload documents you are not allowed to share.
Select your file, add your signature and download the signed PDF. Free, no sign-up.