How to Crop and Resize an Image to Exact Pixels Online for Free
A form wants a photo of exactly 600 × 600 pixels, a thumbnail has to be 16:9, a profile picture must be square, or a camera photo is simply too big. All of these need the same two operations: cut away the part you do not want (crop) or change the number of pixels (resize). The ToolTiny Image Crop & Resize tool does both in your browser, with a frame you drag, boxes where you type exact numbers and ready-made aspect ratios. This guide follows a real recording with a 6,000 × 4,000 photo, with the exact sizes that appeared on screen, and warns about one setting that can stretch your picture.
When Do You Need to Crop or Resize?
- Forms and portals: many ask for a photo with a given width and height in pixels.
- Social media: square 1:1 for posts, tall 9:16 for stories, wide 16:9 for video thumbnails.
- Websites: a smaller picture loads faster, and a link preview image is often 1200 × 628 (the tool has an OG 1200 quick size).
- Documents and slides: keep only the part of a photo that matters.
- Big camera photos: a 6,000 × 4,000 picture is far larger than most screens need.
Crop or Resize: What Is the Difference?
| Crop | Resize | |
|---|---|---|
| What it does | Cuts away the outside of a frame you choose | Changes the width and height of the whole picture |
| What you see | Less of the scene, same sharpness | The whole scene, smaller or larger |
| You set | X, Y, Width, Height, or a ratio like 1:1 | Width and height in pixels |
| Typical use | Square profile picture, remove empty space | Make a photo fit a size limit |
You can use both on the same picture, one after the other.
Watch the Whole Process
The recording resizes a large photo with the quick sizes, crops it with the aspect ratio presets, chooses the format and downloads the result.
How to Crop and Resize an Image, Step by Step
-
Open Image Crop & Resize
Open the Images menu in the top bar and choose Image Crop & Resize, or go straight to tooltiny.com/image-crop-resize.html.
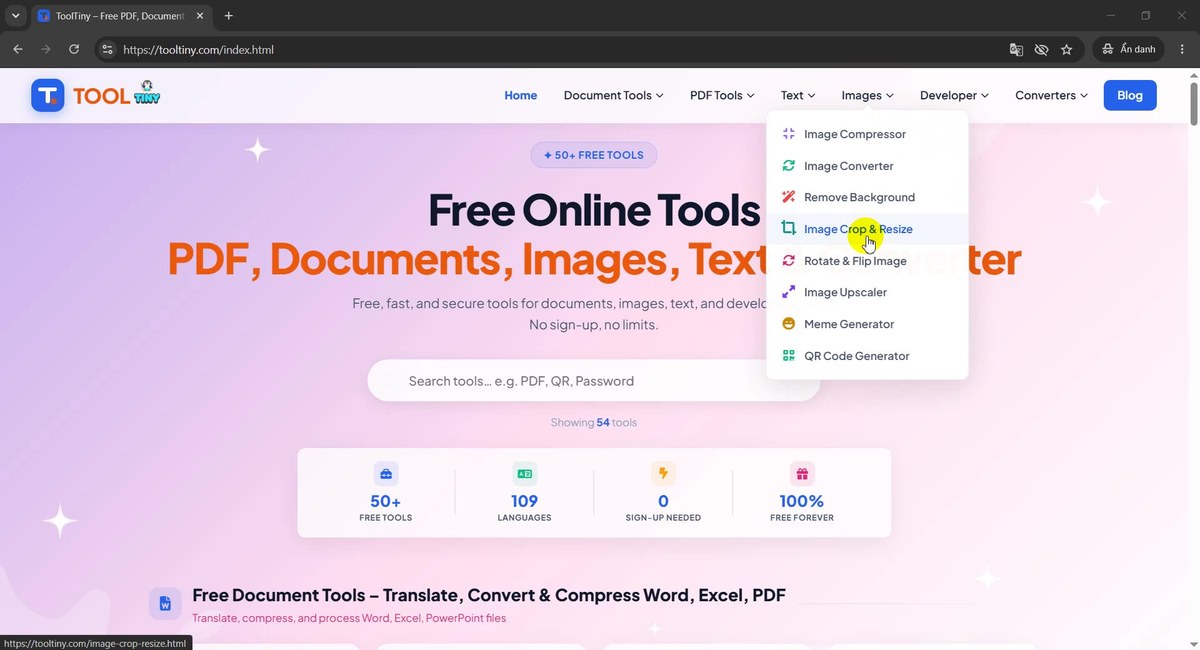
Images → Image Crop & Resize -
Find the upload box
The page shows a Drop your image here box with the note “JPG, PNG, WebP, GIF, BMP” and Max 20MB. Drop a picture on it or click the box to choose a file.
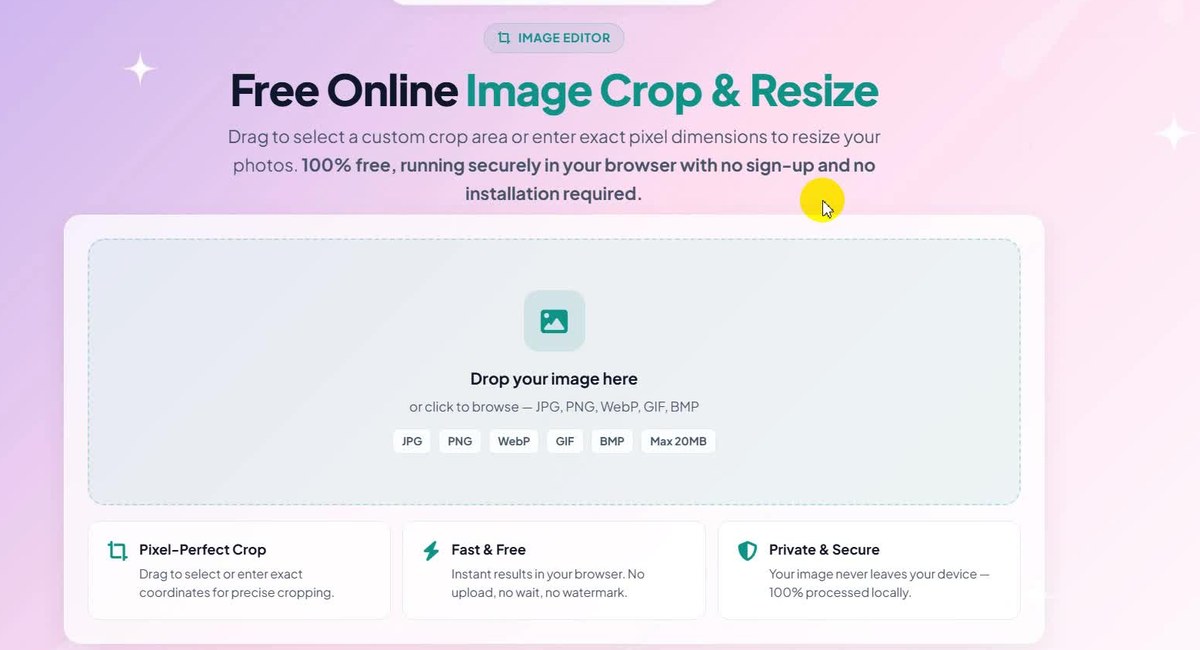
Drop an image or click the box -
Choose a photo
In the file window select your picture and press Open. We chose a large photo of a woman on a beach at sunset.
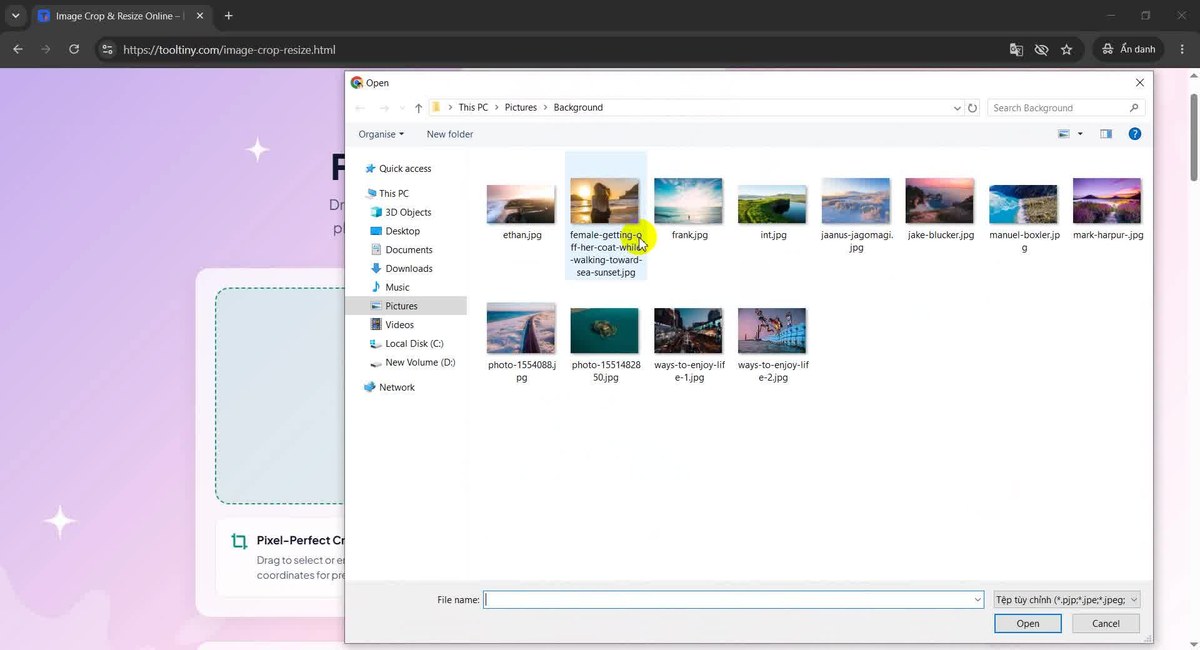
Select one image -
Look at the workspace
The photo opens in the Original Image box on the left. Above it, at the right of the title, the tool shows the real size: our photo is 6,000 × 4,000 px. The panel on the right has two tabs, Crop and Resize, and the X, Y, Width and Height boxes show the whole picture (0, 0, 6000, 4000).
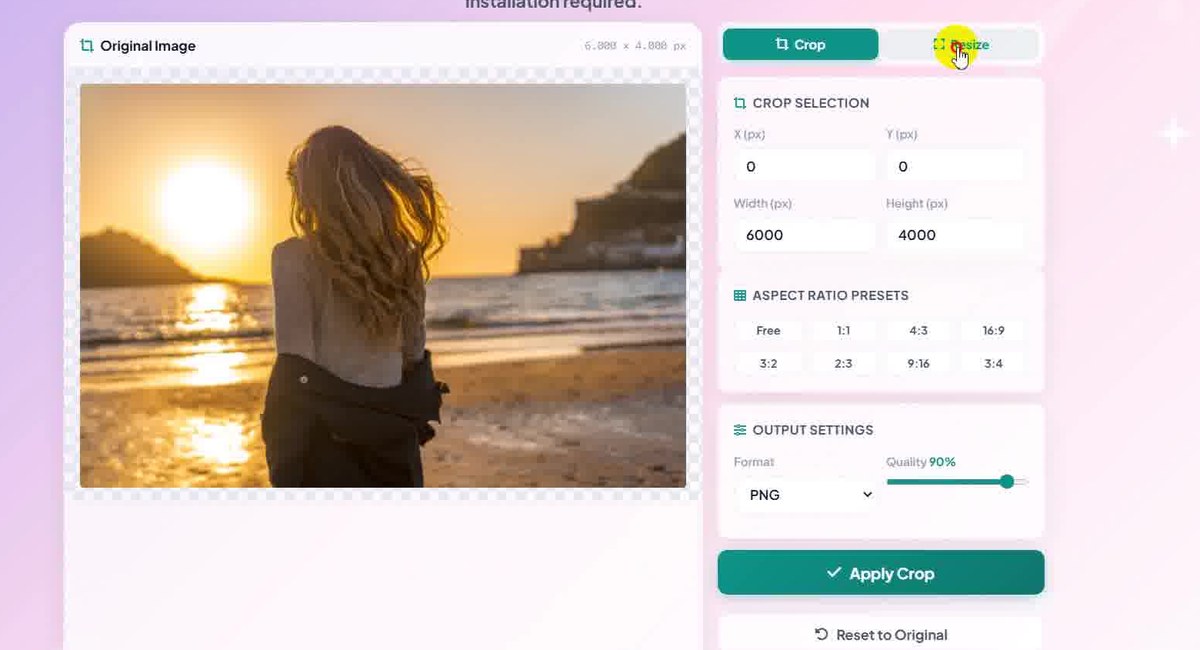
Left: the picture. Right: Crop and Resize tabs -
Open the Resize tab
Click Resize. The Output Dimensions boxes show the current width and height. Lock aspect ratio is switched on, so if you type a new width the height follows by itself and the picture keeps its proportions.
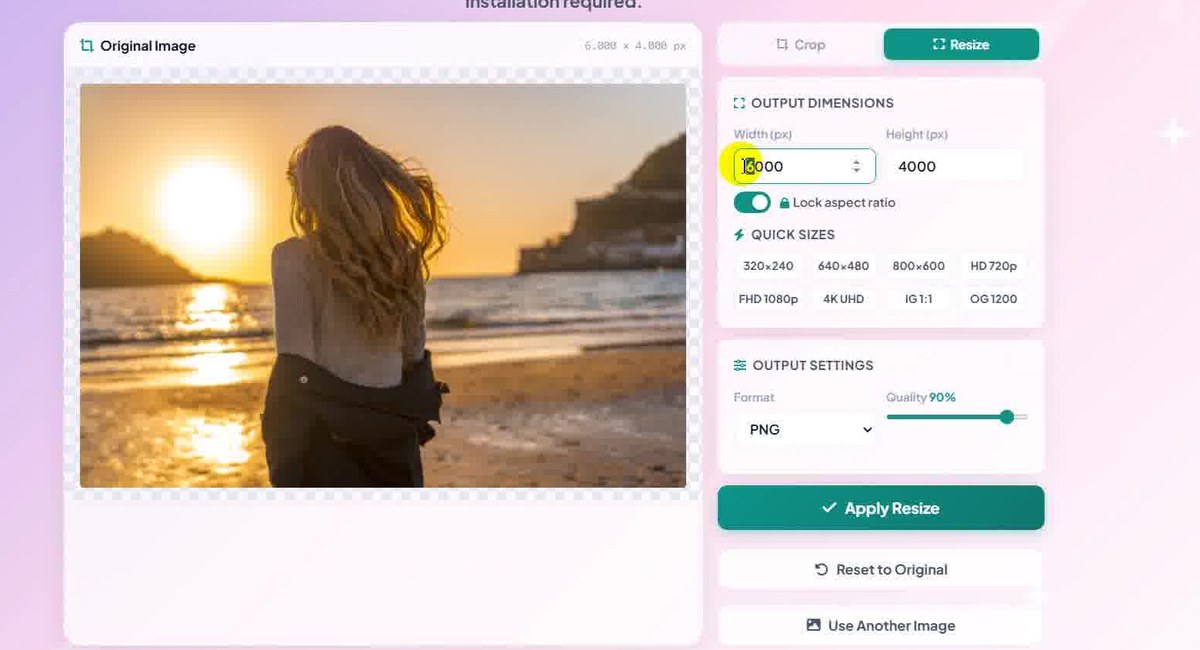
Resize tab with the lock switched on -
Try the Quick Sizes
Under Quick Sizes are ready-made sizes: 320×240, 640×480, 800×600, HD 720p, FHD 1080p, 4K UHD, IG 1:1 and OG 1200. We clicked FHD 1080p and the boxes changed to 1920 × 1080. Notice that the Lock aspect ratio switch turned itself off.
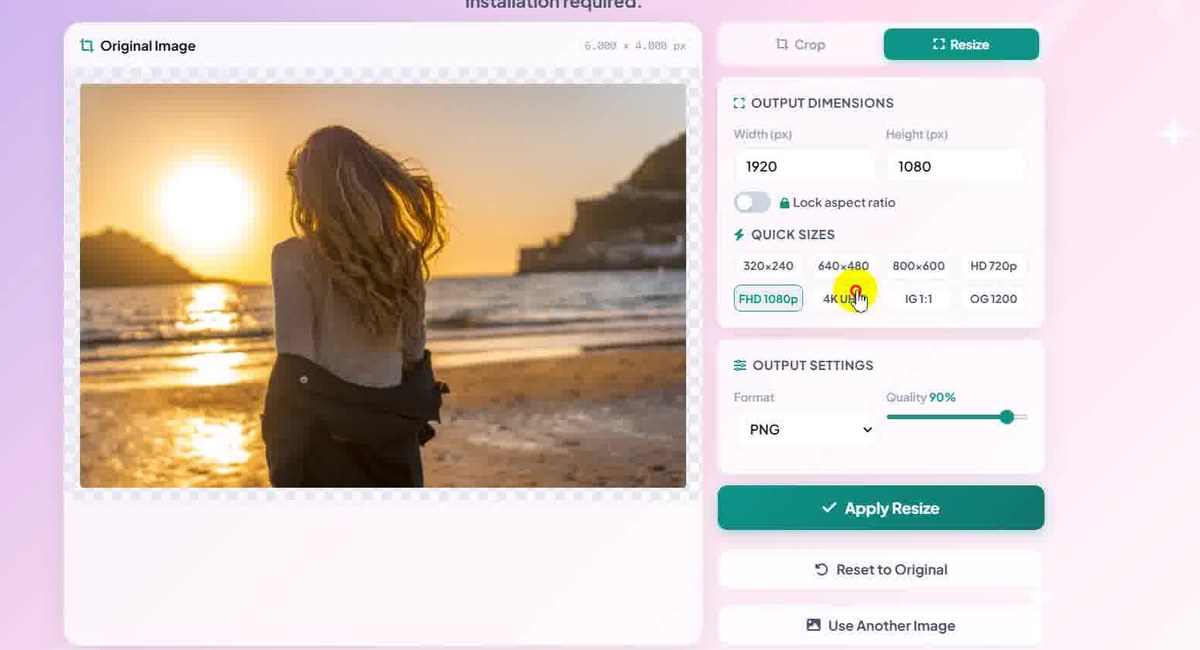
Quick size FHD 1080p: 1920 x 1080 -
Press Apply Resize
Press Apply Resize. The title above the picture changes to Resized Image and the size next to it reads 1,920 × 1,080 px. Look at the result: our photo was 3:2 and the new size is 16:9, so the picture is stretched sideways. Read the warning below this list before you use a quick size.
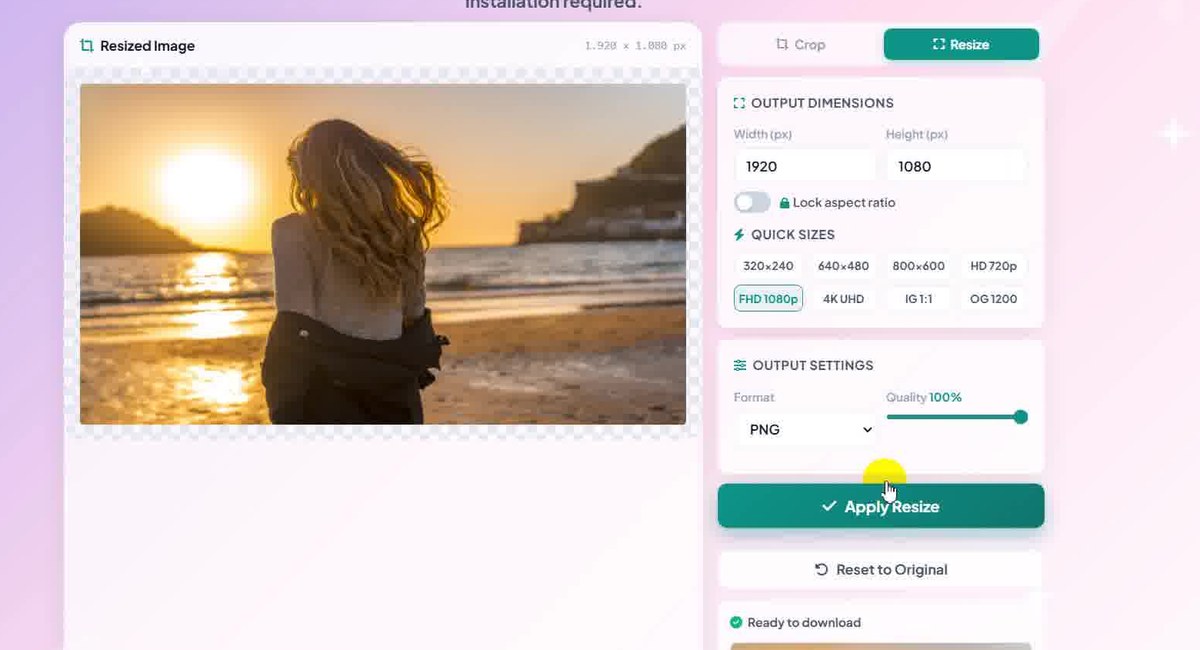
Resized Image: 1,920 x 1,080 px -
Switch to the Crop tab
Click Crop. The crop works on the picture you see now, so in our recording it used the resized 1920 × 1080 image. The four boxes show X, Y, Width and Height of the selection.
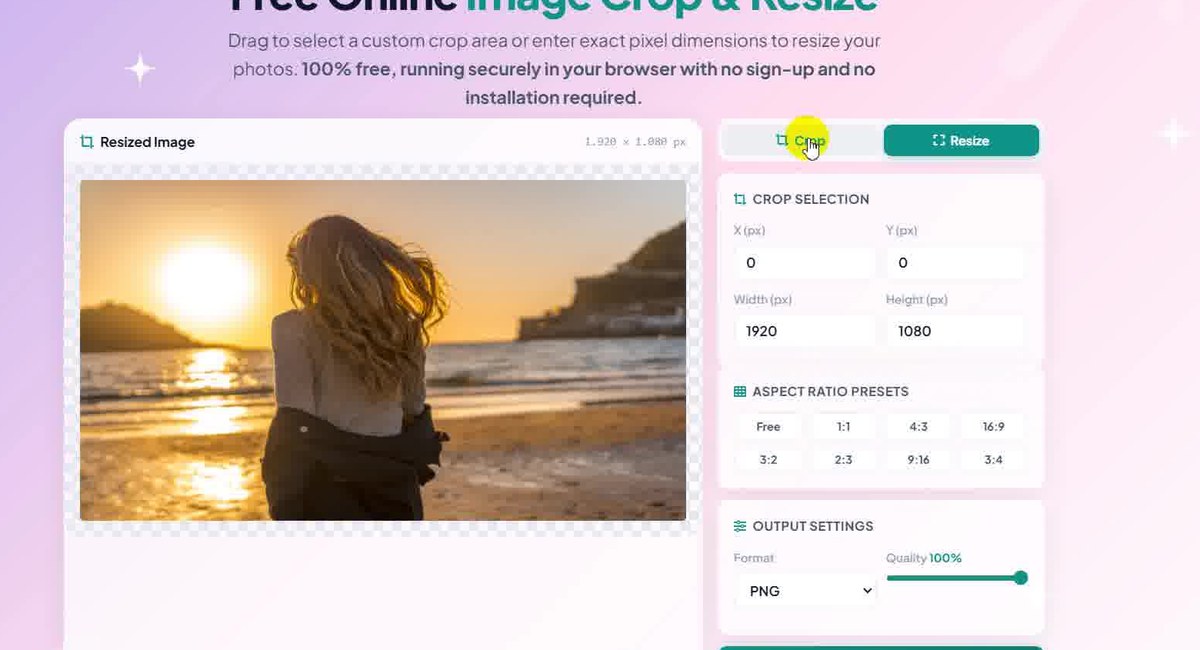
Crop works on the current picture -
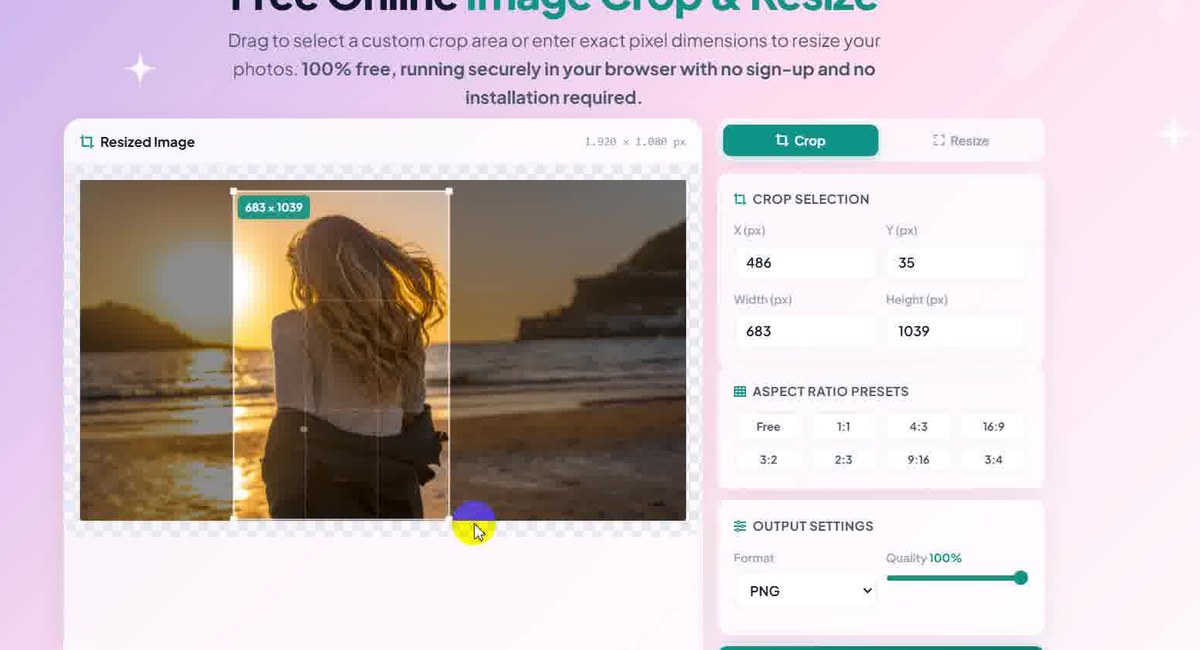
Drag to select an area
Press the mouse on the picture and drag. A frame appears with a dark area around it and a small label with the size of the selection. Our first frame was 683 × 1039 px. The X, Y, Width and Height boxes fill in as you drag, and you can also type numbers in them.
Drag a frame, read its size in the label -
Use an aspect ratio preset
Under Aspect Ratio Presets choose Free, 1:1, 4:3, 16:9, 3:2, 2:3, 9:16 or 3:4. Click a preset, then drag on the picture: the frame keeps that proportion. With 9:16 our frame came out 574 × 1021 px.
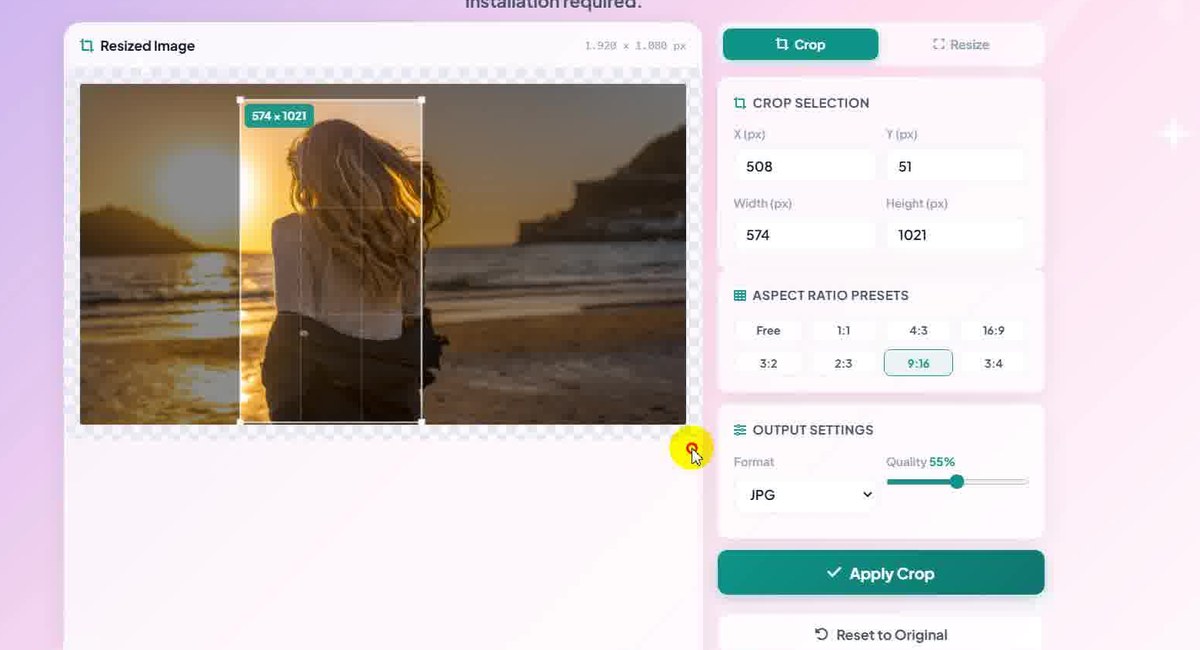
9:16 gives a tall frame, 574 x 1021 -
Try 1:1 for a square
With 1:1 the width and the height are always the same. Our square frame was 1015 × 1015 px. Move the mouse onto the picture and drag again to place a new frame.
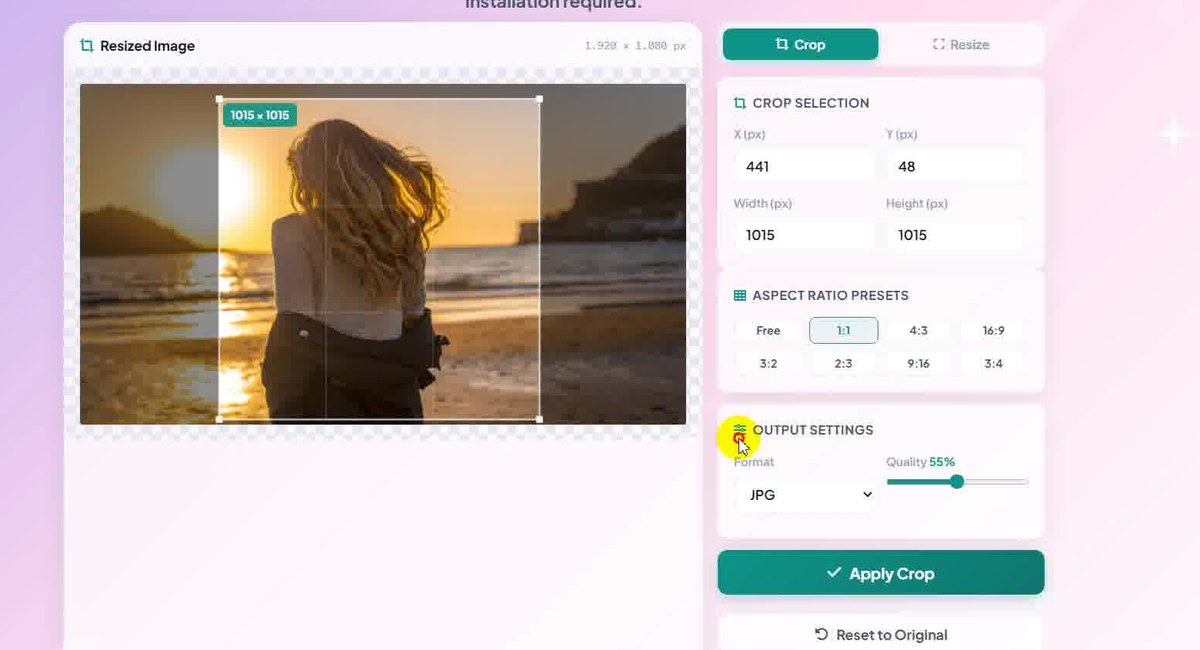
1:1: a square frame, 1015 x 1015 -
Choose the format and quality
In Output Settings pick JPG, PNG or WebP. For JPG and WebP the Quality slider sets how much the file is compressed: lower means a smaller file with less detail. In our recording the slider went from 95% to 55%.
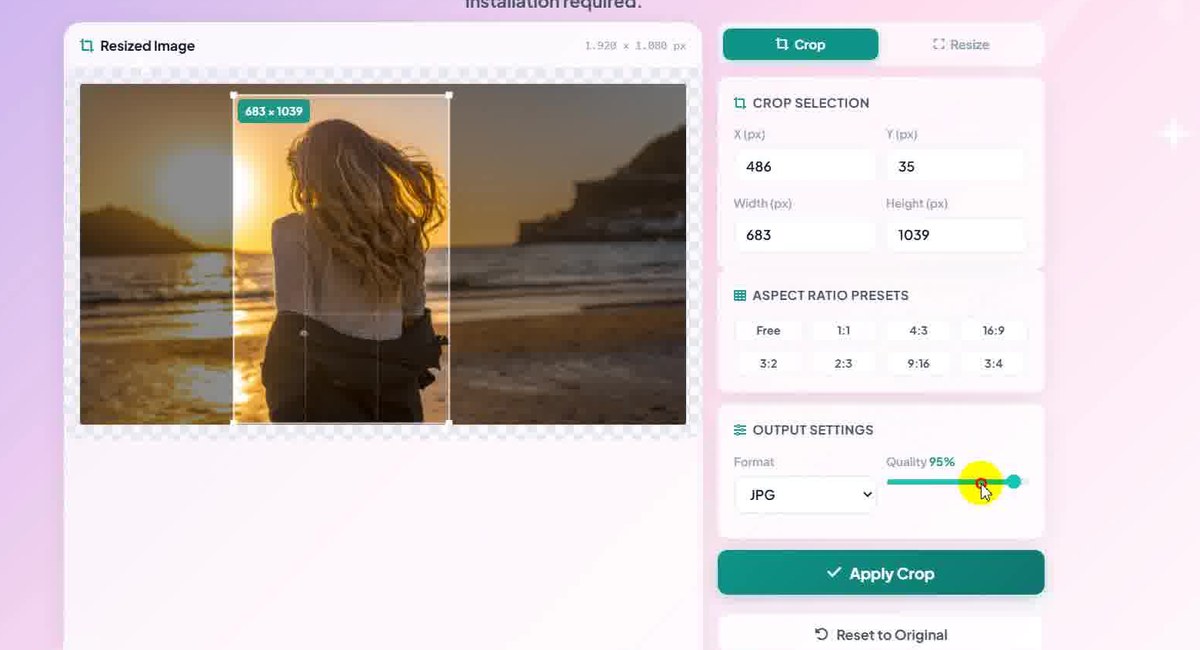
Pick a format, then the quality -
Press Apply Crop
Press Apply Crop. The title changes to Cropped Image and the size next to it shows 1,015 × 1,015 px. If you do not like the result, press Reset to Original to go back to the photo you opened.
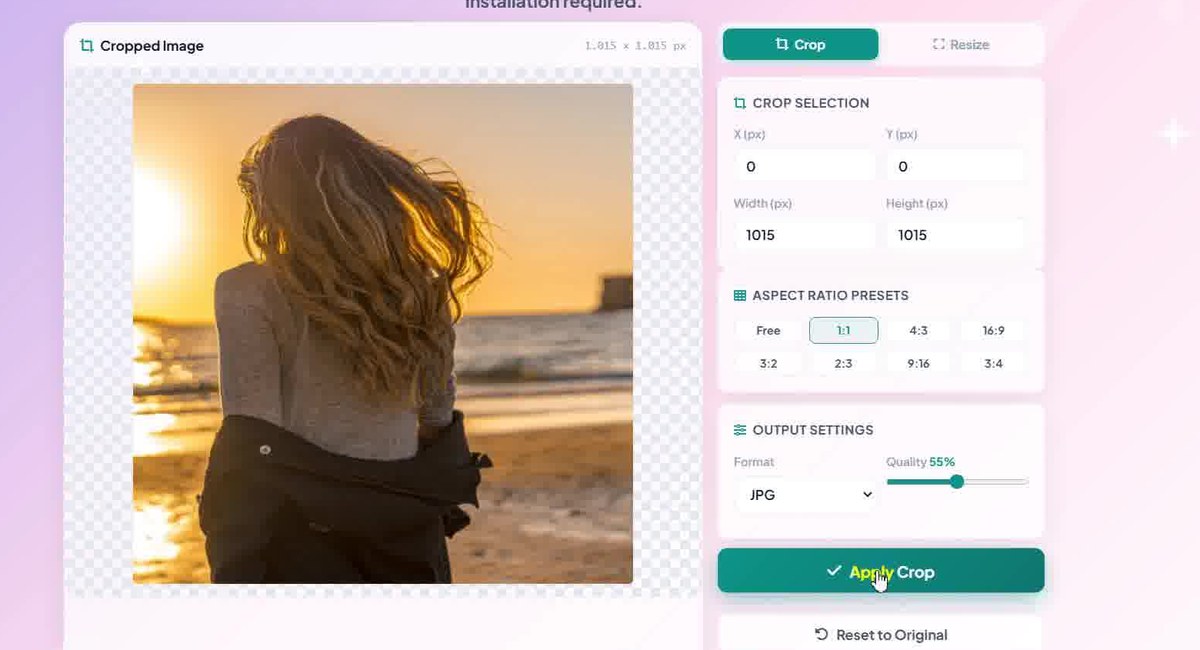
Cropped Image: 1,015 x 1,015 px -
Download the image
A Ready to download box appears under the buttons with a small preview and a line with the size, for example 1015 × 1015 px and the file size and format (about 1.1 MB as PNG in our recording). Click Download Image.
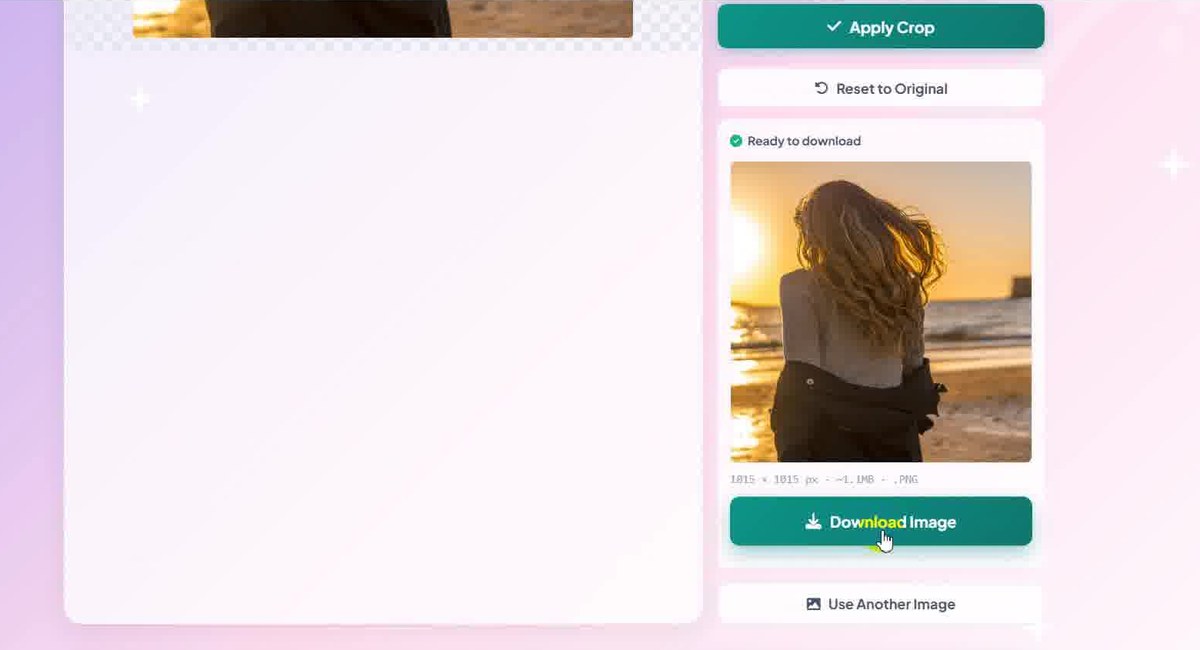
Check the preview, then Download Image -
Save the file
Choose a folder in the Save As window and press Save. The folder names in this picture are blurred. Use Use Another Image to start with a new picture.
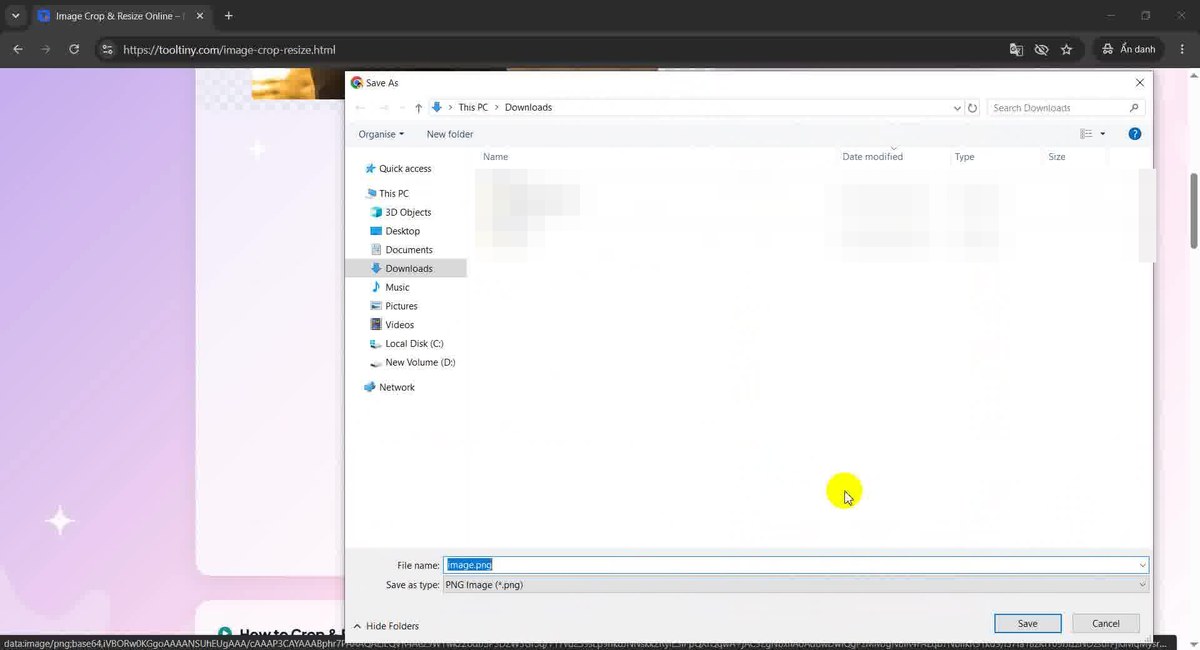
Choose a folder and press Save
Avoid a Stretched Picture
In our recording the photo was 6,000 × 4,000, a 3:2 shape. Clicking FHD 1080p set 1,920 × 1,080, a 16:9 shape, and the picture was stretched sideways. The cause is visible on screen: a quick size turns Lock aspect ratio off and fills in both numbers. Two ways to keep the proportions:
- Type only the width with Lock aspect ratio switched on. The height is worked out for you. For a 6,000 × 4,000 photo, a width of 1,500 gives a height of 1,000.
- Crop to the shape first. Choose the ratio (for example 16:9), crop, then resize. Then 1,920 × 1,080 does not distort anything.
Aspect Ratio Presets
The presets are Free, 1:1, 4:3, 16:9, 3:2, 2:3, 9:16 and 3:4. The frames we dragged in the recording, on the 1,920 × 1,080 picture, had these sizes:
| Preset | Typical use | Frame in our recording |
|---|---|---|
| 1:1 | Profile picture, square post | 1015 × 1015 |
| 3:2 | Camera photo shape | 1321 × 881 |
| 9:16 | Tall story or phone screen | 574 × 1021 |
| 16:9 | Video thumbnail, slide | (wide frame) |
The numbers depend on where you drag and on the size of the picture, so yours will be different. What stays the same is the shape of the frame.
Good to Know
- Crop works on the current picture. After you press Apply Resize, the next crop starts from the resized image. Reset to Original brings back the photo you opened.
- Files up to 20 MB in JPG, PNG, WebP, GIF or BMP. You can save as JPG, PNG or WebP.
- The result can be up to 8,000 px per side. If you type more, the tool asks you for a smaller size.
- Making a picture larger does not add detail. It only makes the same pixels bigger.
- JPG cannot keep transparency. Save a picture with a transparent background as PNG or WebP.
- An animated GIF becomes a still picture.
- Free: no sign-up, no watermark.
Tips for Better Results
- Crop first, resize second. Then the size you type at the end is the size you get.
- Keep the lock on unless you really want to change the shape of the picture.
- Read the label on the frame. It shows the size of your selection in pixels while you drag.
- Type numbers for exactness. Drag a rough frame, then correct X, Y, Width and Height in the boxes.
- Need a smaller file, not a different size? Use the Image Compressor or lower the Quality slider for JPG and WebP.
- Keep your original. The tool gives you a new file. More guides are on our blog.
Drag a frame or type exact pixels, then download. Free, no sign-up.