How to Compress Multiple Images at Once and Download a ZIP for Free
A phone photo is easily 3 to 5 MB, and a camera photo can reach 16 MB. Ten of them will not fit in most e-mails and make a web page slow. Compressing them one by one is a chore. The ToolTiny Image Compressor now takes up to 50 photos at once, applies one quality setting to all of them, shows each result next to its original and gives you everything back as a single ZIP file. This guide follows a real recording with four photos that went from 24.3 MB to 6.1 MB, and it also explains what the tool does with each file type.
When Is Bulk Compression Useful?
- E-mail and messaging: bring a folder of photos under an attachment limit.
- Websites and blogs: shrink the images before you upload them to a page or a product catalogue.
- Forms and portals: many upload forms refuse files above a few megabytes.
- Storage and backups: keep a lighter copy of a large photo collection.
- Reports and slides: smaller pictures make documents faster to open and send.
If you want the background on formats and why smaller images help a site, read our guide to compressing images without losing quality. This page is about the workflow for many files.
Watch the Whole Process
The recording opens the tool, adds three photos, previews them, changes the quality, adds a fourth photo, downloads the ZIP and opens it on the computer.
How to Compress Multiple Images, Step by Step
-
Open Image Compressor
Open the Images menu in the top bar and choose Image Compressor, or go straight to tooltiny.com/image-compress.html.
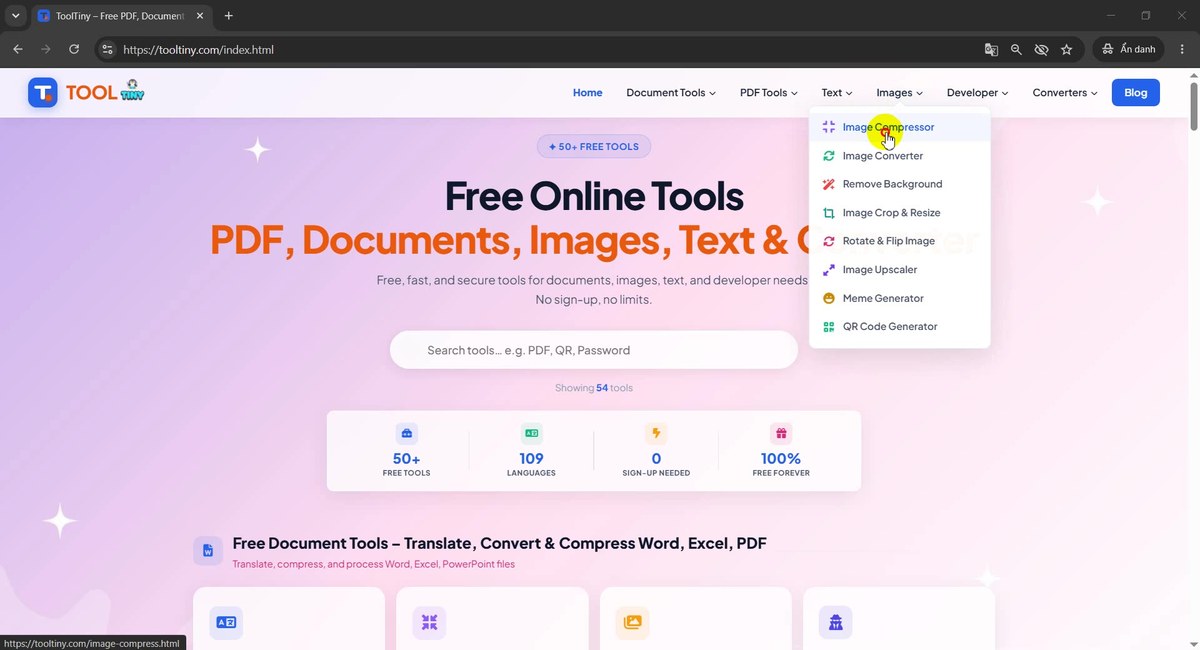
Images → Image Compressor -
Find the upload box
The page opens with a large Upload Your Images box that says “Drag & drop up to 50 JPG, PNG, or WebP images here”. Drop your photos on it or press Select Images.
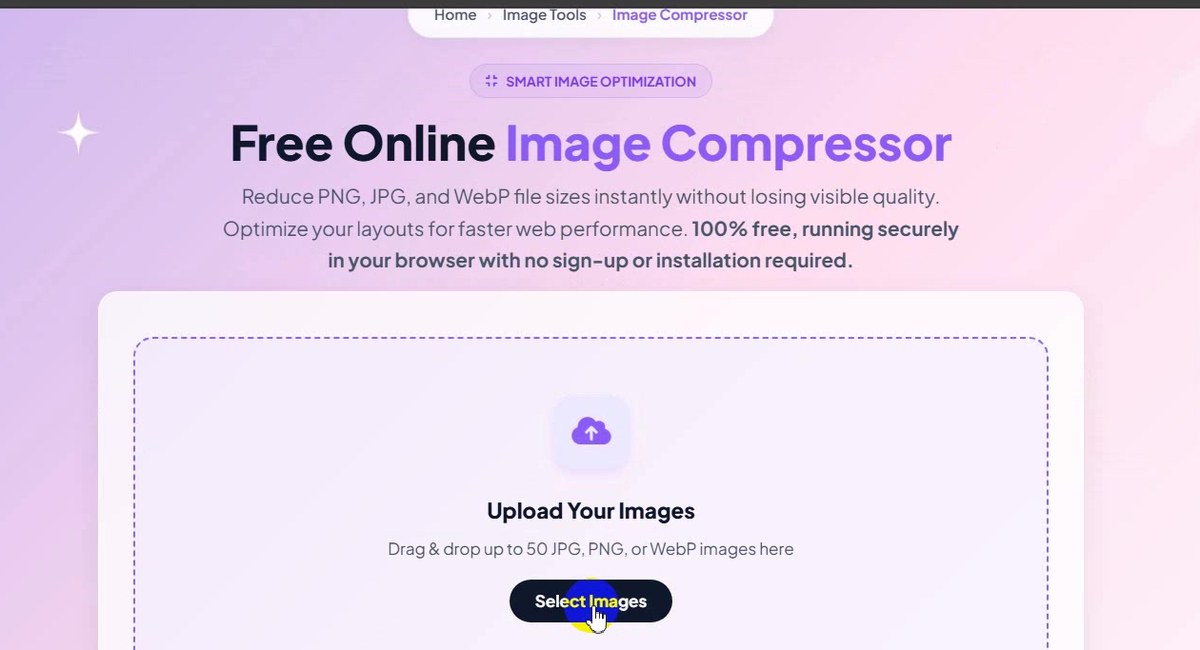
Drag photos here or press Select Images -
Select several images
In the file window, select more than one photo: hold Ctrl and click each one, or drag a frame around them. In our recording we picked three photos, and the file name box lists all three. Then press Open.
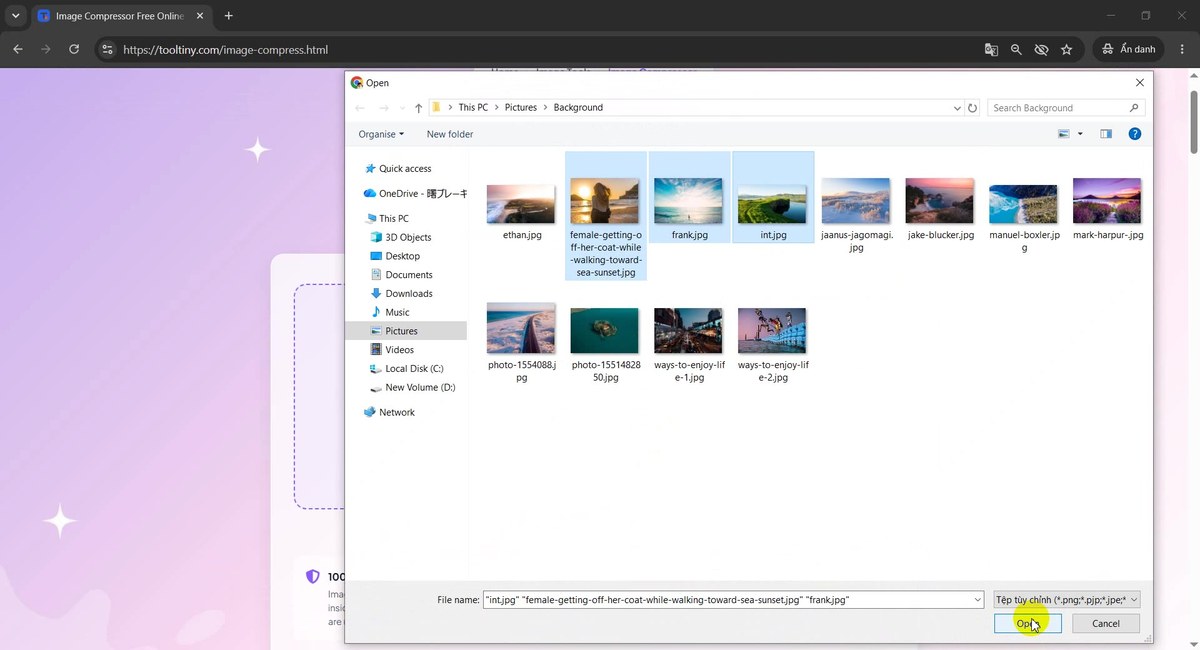
Three photos selected at once -
Wait for the first results
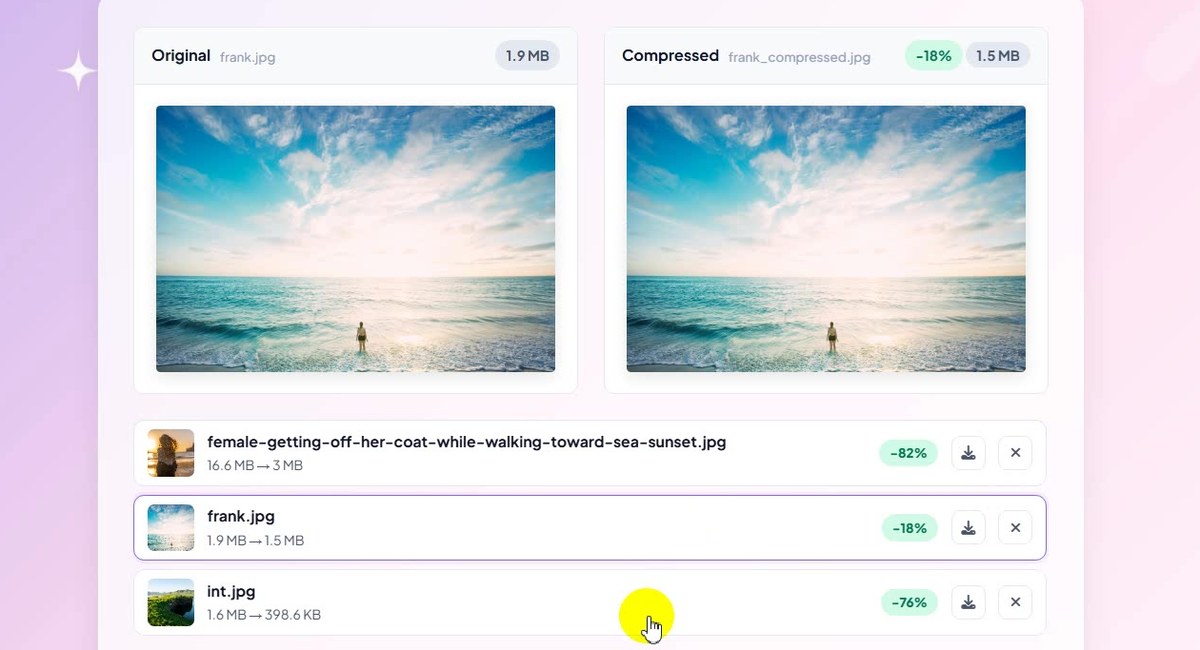
The photos are compressed right away, one after another. For each one you see a row with a small preview, the size before and after, and a green percentage. In our recording the biggest photo went from 16.6 MB to 3 MB (−82%) at the default 80% quality. Above the list, Original and Compressed show the selected photo side by side.
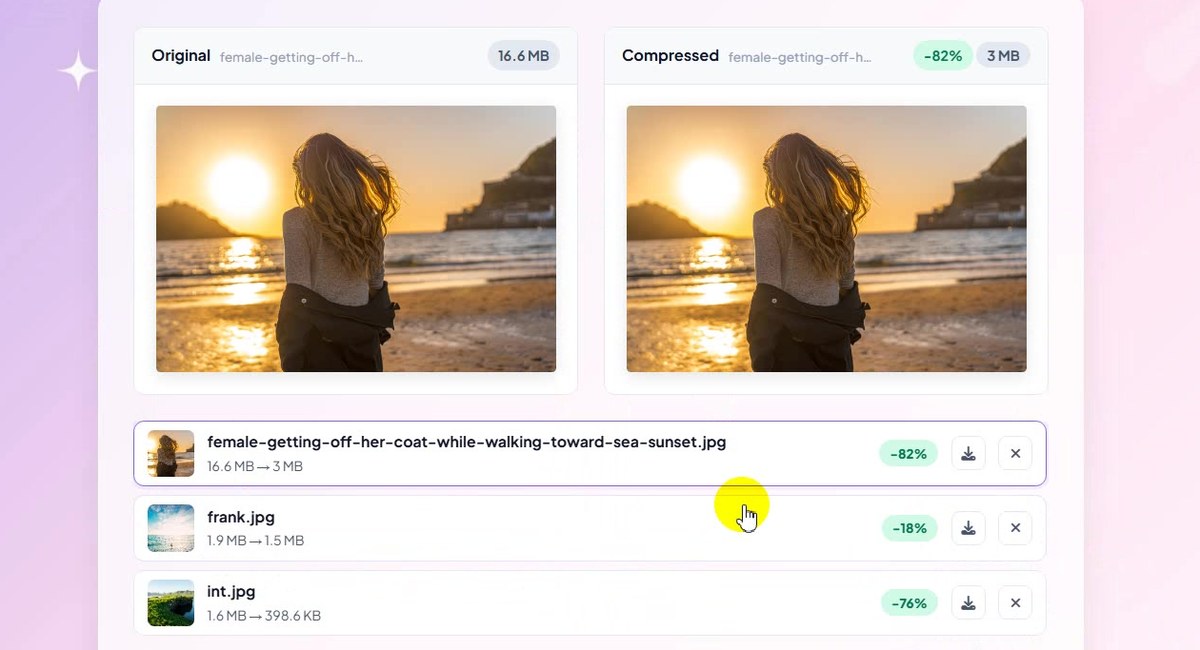
Original left, compressed right, one row per photo -
Click a row to preview it
Click any row to see that photo in the two preview boxes. We clicked frank.jpg: 1.9 MB became 1.5 MB (−18%). Each row also has a download arrow for that one photo and a cross to remove it from the list.
Click a row to compare that photo -
Move the quality slider
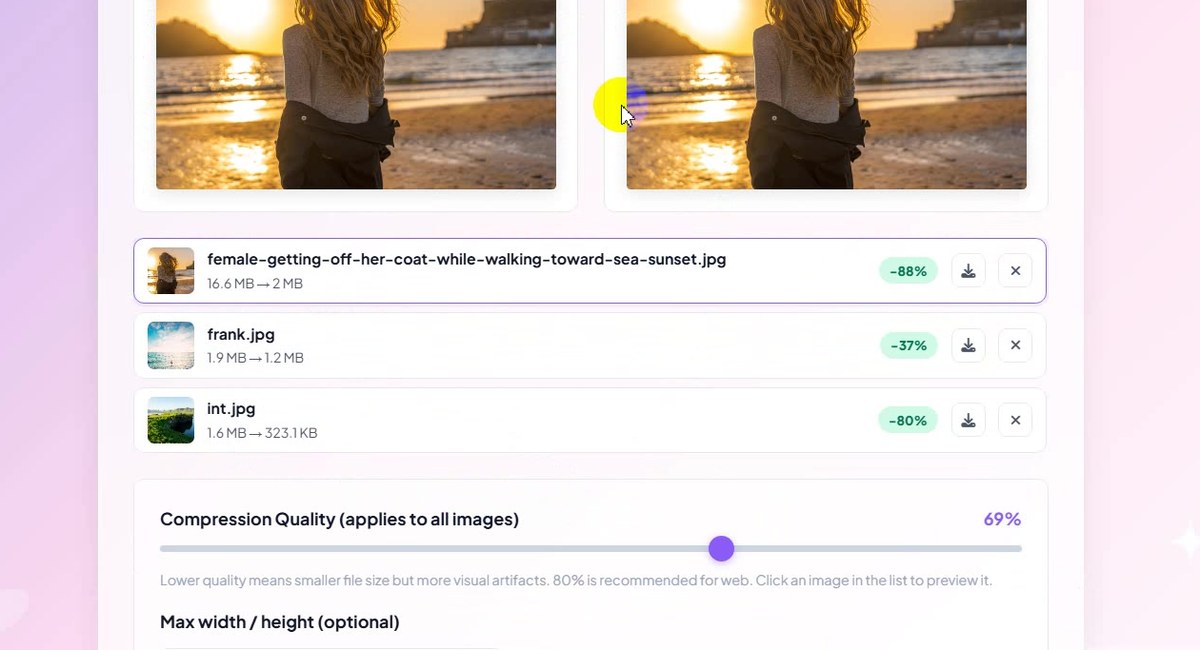
Compression Quality applies to all photos at once. The default is 80%. We moved it down to 69% and every row updated after a moment: 16.6 MB became 2 MB, frank.jpg 1.2 MB and int.jpg 323.1 KB. Lower quality gives smaller files but more visible compression, so look at the preview before you settle on a value.
One slider for the whole batch -
Read the summary
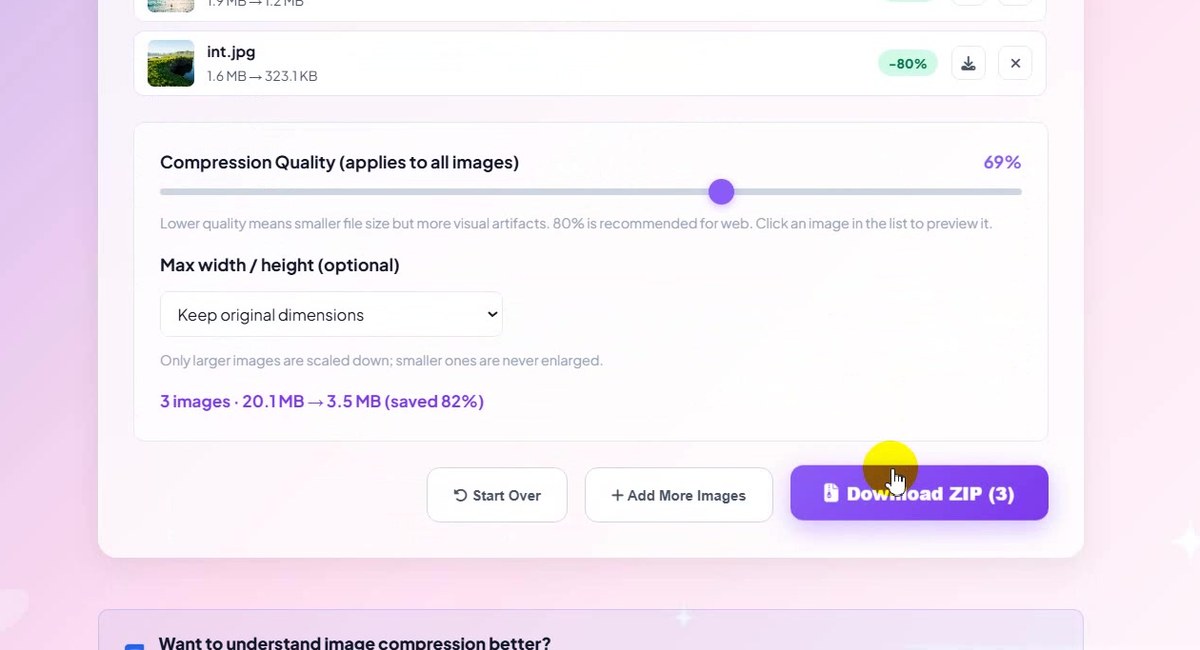
Under the slider, Max width / height can shrink large photos (more on that below). The line under it adds everything up: 3 images · 20.1 MB → 3.5 MB (saved 82%). The purple button now says Download ZIP (3).
Total before and after -
Add more images
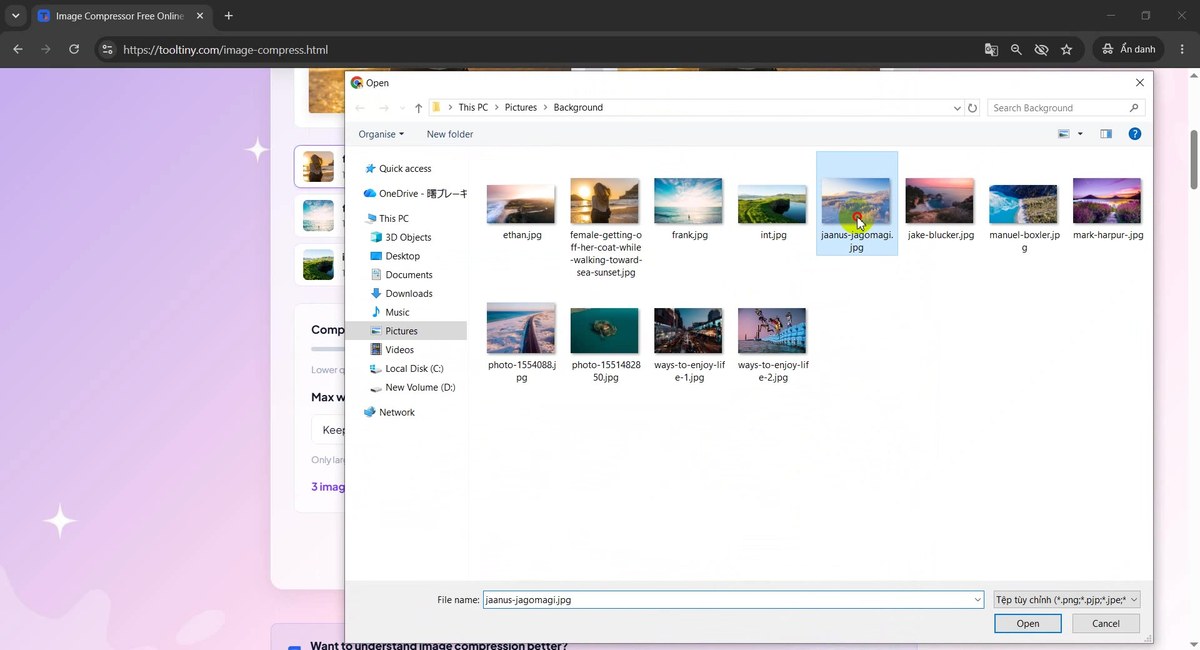
Forgot one? Press Add More Images and choose more photos. They are added to the same list, up to 50 in total. We added a fourth photo.
Add More Images -
Check the new total
The new photo is compressed with the current settings and joins the list: jaanus-jagomagi.jpg, 4.1 MB → 2.6 MB. The summary now reads 4 images · 24.3 MB → 6.1 MB (saved 75%) and the button says Download ZIP (4).
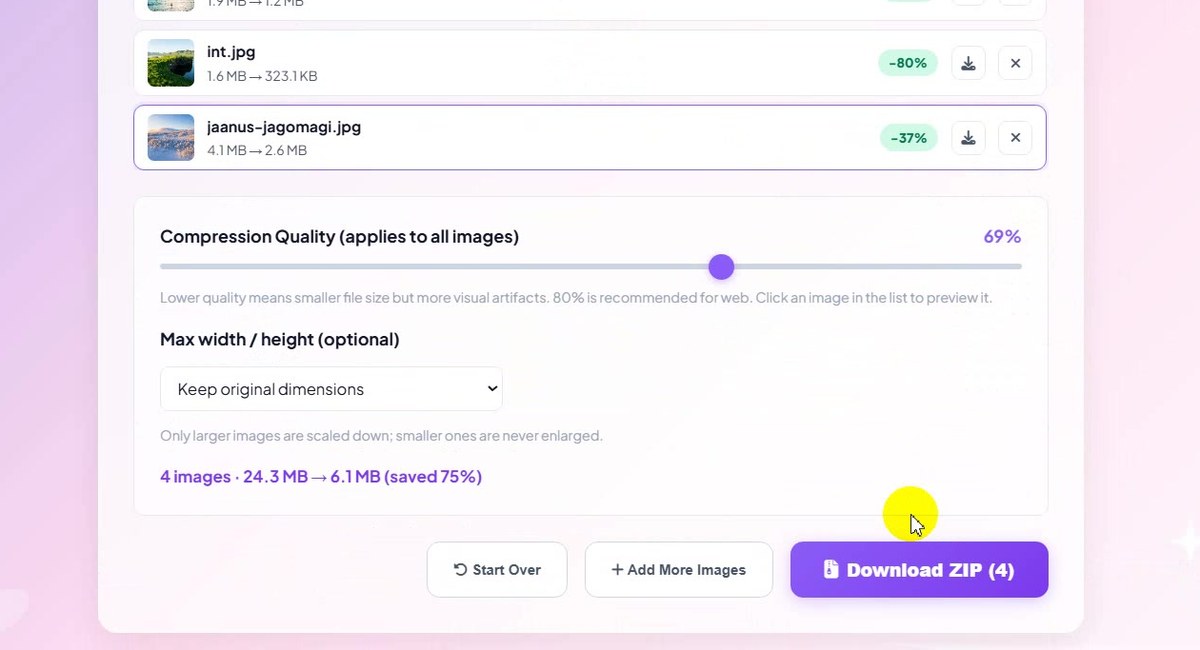
Four photos, 75% saved -
Download the ZIP
Click Download ZIP. The browser offers a file called tooltiny-compressed-images.zip. Choose a folder and press Save. The ZIP is built on your computer, so there is nothing to wait for on a server.
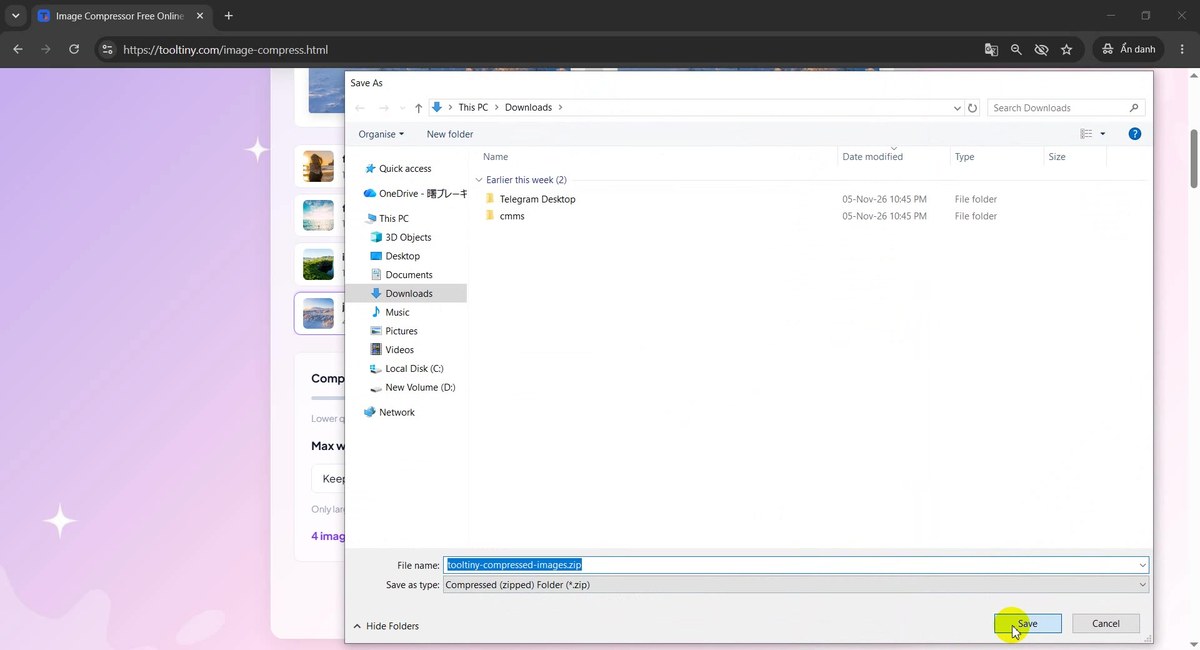
Save tooltiny-compressed-images.zip -
Extract the ZIP
Open your Downloads folder, right-click the ZIP and extract it. Windows has Extract All in the same menu; in our recording a ZIP program was used to extract it into a folder with the same name.
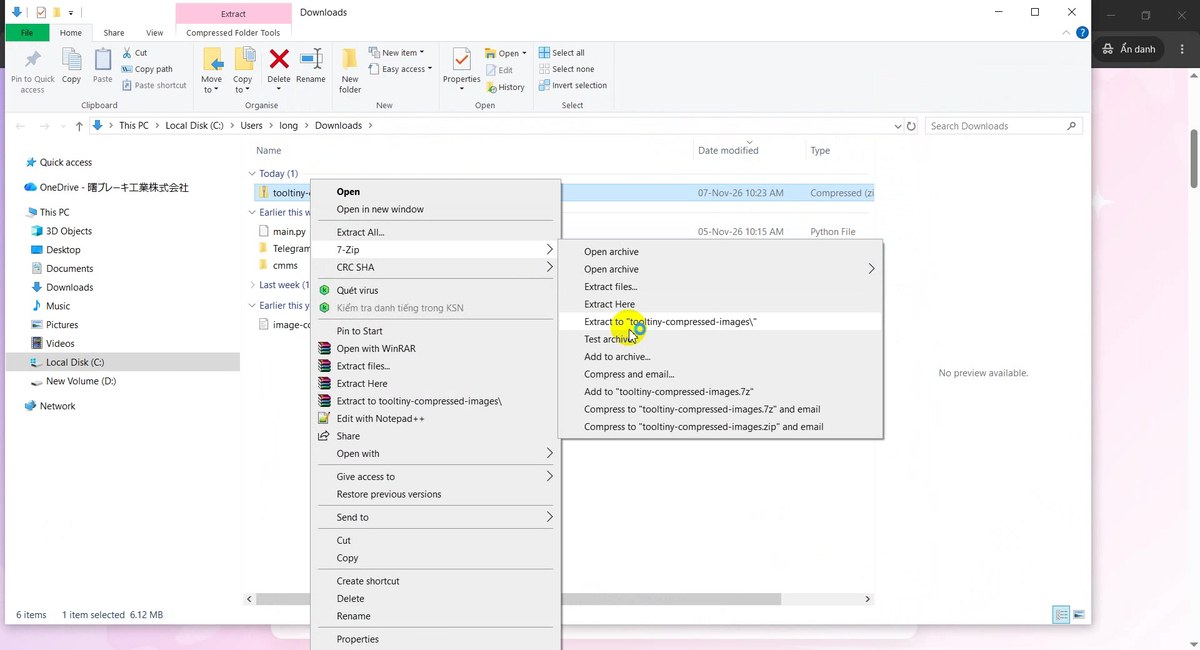
Right-click → Extract -
Check the files
The folder holds the four compressed photos. We selected all four and opened Properties: 4 files, 6.12 MB, the same total the page promised. Each file keeps its name with _compressed added.
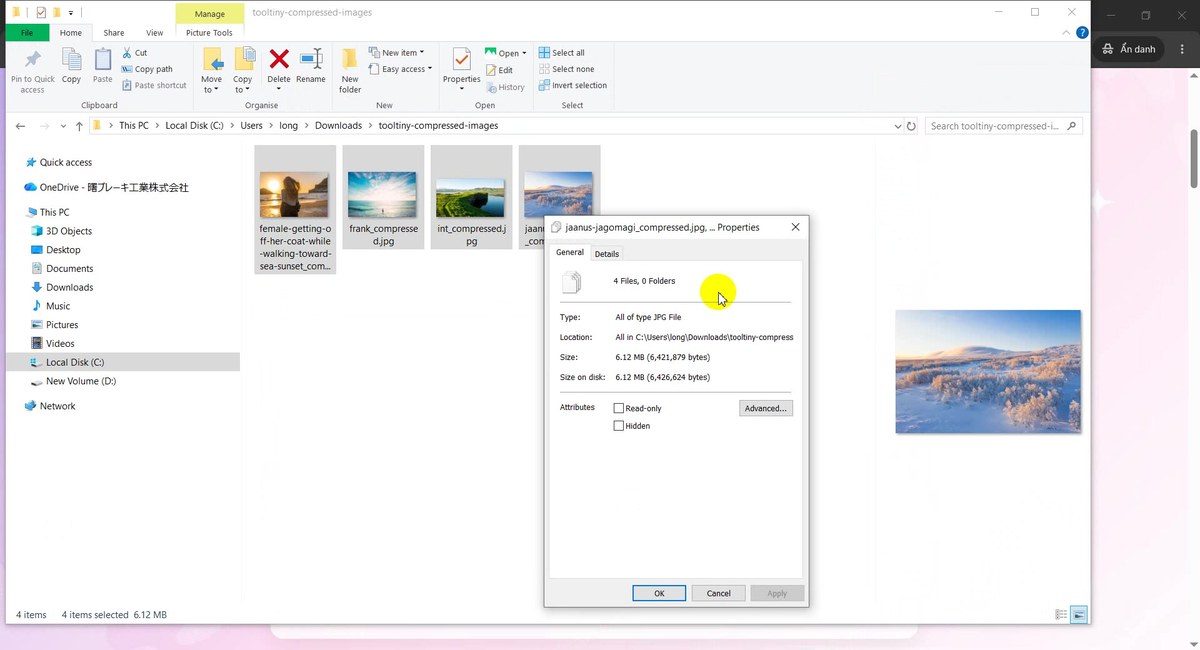
4 files, 6.12 MB
How Quality Changes the File Size
The same three photos from our recording at three quality settings. The slider moved the numbers like this:
| Photo | Original | 92% | 80% | 69% |
|---|---|---|---|---|
| female-getting-off-her-coat….jpg | 16.6 MB | 4.5 MB (−73%) | 3 MB (−82%) | 2 MB (−88%) |
| frank.jpg | 1.9 MB | Already small | 1.5 MB (−18%) | 1.2 MB (−37%) |
| int.jpg | 1.6 MB | 539.2 KB (−67%) | 398.6 KB (−76%) | 323.1 KB (−80%) |
Two things stand out. First, a lower number always gives a smaller file, but the gain gets smaller and smaller while the picture loses detail. Second, the saving depends on the photo: the 16.6 MB photo shrank by 82% at 80%, while frank.jpg shrank by only 18%. How much you save depends on the picture and on how it was saved before, so you cannot predict one photo from another.
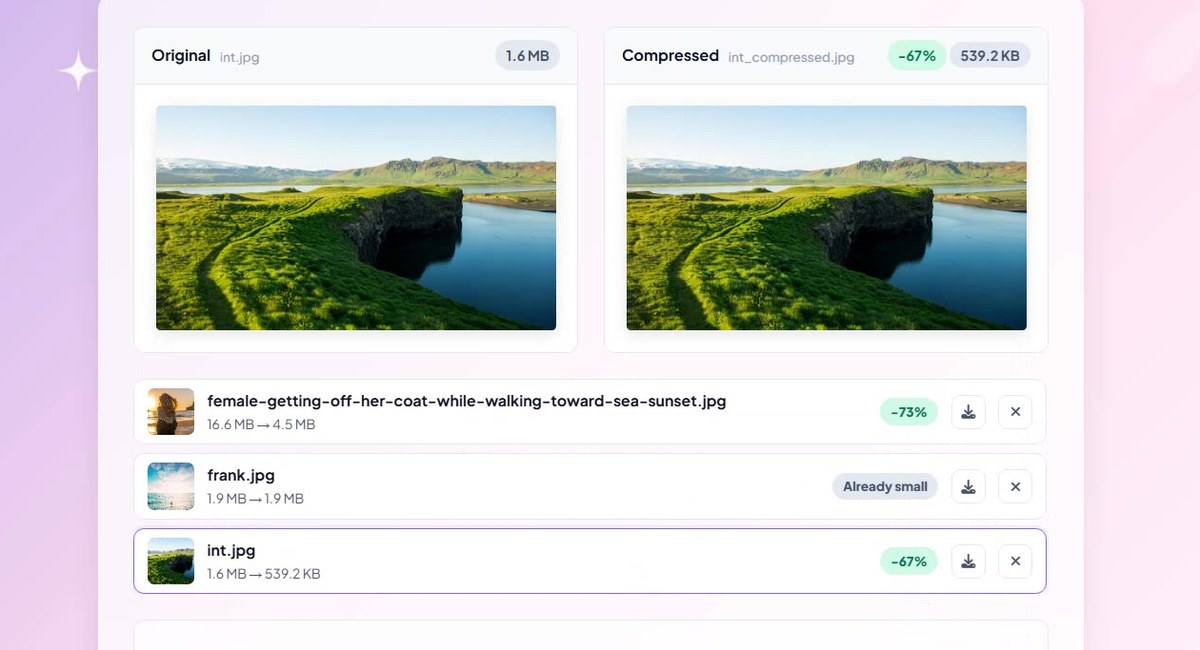
That grey Already small badge is a feature, not an error. The tool only replaces a photo when the compressed version is really smaller. Otherwise the original goes into the ZIP unchanged and keeps its own name. If you want that photo compressed too, move the slider down a few points and its row updates.
What Happens to Each Image Format
| You add | You get | Notes |
|---|---|---|
| JPG / JPEG | JPG | Same format, same dimensions unless you set a maximum size |
| PNG | WebP | Transparent areas are kept. WebP is usually much smaller than PNG |
| WebP | WebP | Re-saved at the chosen quality, transparency kept |
| GIF and other formats | Not accepted | The tool skips them and tells you which files it skipped |
Because a PNG leaves as a WebP, its name ends in .webp. Modern browsers, phones and most websites handle WebP. If you need a PNG or JPG file back, use the Image Converter afterwards.
Shrink Big Photos Further with Max Width / Height
Below the quality slider is a drop-down called Max width / height. It keeps the original dimensions by default. You can also choose a longest side of 3840, 2560, 1920, 1280 or 800 px. Photos larger than that are scaled down with the same proportions, and photos that are already smaller are never enlarged. A 4000 × 3000 photo set to 1920 px becomes 1920 × 1440, which saves much more space than quality alone. Pick a value that fits where the picture will be shown: a full-screen website image rarely needs more than 1920 px, a small thumbnail needs far less.
Good to Know
- The work happens in your browser. The photos are not uploaded to our server. We checked that no image data leaves the page while compressing and downloading.
- Up to 50 images at a time. Very large photos use a lot of memory. If the ZIP cannot be built, compress a smaller group and download several ZIP files.
- Camera data and GPS are removed. Every image is re-encoded, so EXIF information such as the camera model and the location is not copied into the new file. That is helpful before you share a photo, but keep the original if you need the data.
- Your originals are never changed. You always download new copies, named with _compressed added. If two files would get the same name, the second one is numbered, for example (2).
- A broken image does not stop the batch. Its row shows Error and the others carry on.
- The ZIP is not smaller than its photos. JPG and WebP are already compressed, so the ZIP is only a convenient package. Our four photos came to 6.12 MB inside the ZIP.
- Free: no sign-up, no watermark.
Tips for Better Results
- Start at 80%. Lower it while the preview still looks fine to you. At 69% the previews in our recording still looked the same to us, but judge your own photos.
- Check a photo with fine detail first. Click its row and look at the compressed preview before you download.
- Use Max width / height for photos straight from a camera. Most screens do not need 4000 pixels.
- Group similar photos. One quality fits all, so compress screenshots and photos in separate batches.
- Remove what you do not need. The cross on a row takes that photo out of the batch and out of the ZIP.
- Check the summary line. It tells you the total size before and after, which is the number your e-mail limit cares about.
- Keep your originals. Compression is permanent for the new copy. More guides are on our blog.
Select your images, set the quality and download the ZIP. Free, no sign-up.